
Friday, December 28, 2007
IF Soar
Here is my entry to this week's Illustration Friday "Soar" challenge. It is loosely based on the Quebec Folk legend La Chasse-Galerie, that according to some takes place on New Year's Eve -- so with that Happy New Year (but don't go making any deals with the Devil or go flying off in a Bewitched Canoe)!

Friday, December 21, 2007
IF Horizon
Horizon submission for Illustration Friday -- this is an edited version of the horizon I painted for this year's annual greeting card:


Friday, December 14, 2007
critters on mountain
I was out snapping reference photos of the snow today on the mountain and found myself next to this little guy. I like his "pose".


Tuesday, December 11, 2007
DVD compilation is on Amazon!
The SmokingMoose DVD compilation is now available online via Amazon.com.

The product information on Amazon is still a bit vague (I'm hoping to get it updated soon). In the meantime I've copied the description from the CreateSpace Store below. Or you can click on the thumbnail image to see the DVD jacket cover.
Here's what's on the DVD:
my smoking moose film, 8 minutes, 3D computer animation. A moose, a newspaper and a pack of smokes. 2007.
get a grip, 45 seconds, 2D drawings on paper. An exciting new personal sports product. 1994.
to bear oneself, 6 minutes, 2D plasticine drawings on cel. A bear wants to be human. 1992.
TOO MUCH! 2 minutes. Time lapse and still photographs. A tour through New York City in 2 minutes flat. 1991.
License to Kill, Part MCMXC, 3 minutes, 2D pencil drawings on paper. A bear goes hunting. 1990.
Bonus material: previews, other animated clips, Director's commentary, still images and comics.
technical specs:
NTSC DVD-R video - All Regions Enabled.
4:3 - letterboxed where appropriate.
English language - my smoking moose film also in French or with French subtitles.
Running Time 20 minutes - not including bonus material.
Some content may not be suitable for young children.

The product information on Amazon is still a bit vague (I'm hoping to get it updated soon). In the meantime I've copied the description from the CreateSpace Store below. Or you can click on the thumbnail image to see the DVD jacket cover.
Here's what's on the DVD:
my smoking moose film, 8 minutes, 3D computer animation. A moose, a newspaper and a pack of smokes. 2007.
get a grip, 45 seconds, 2D drawings on paper. An exciting new personal sports product. 1994.
to bear oneself, 6 minutes, 2D plasticine drawings on cel. A bear wants to be human. 1992.
TOO MUCH! 2 minutes. Time lapse and still photographs. A tour through New York City in 2 minutes flat. 1991.
License to Kill, Part MCMXC, 3 minutes, 2D pencil drawings on paper. A bear goes hunting. 1990.
Bonus material: previews, other animated clips, Director's commentary, still images and comics.
technical specs:
NTSC DVD-R video - All Regions Enabled.
4:3 - letterboxed where appropriate.
English language - my smoking moose film also in French or with French subtitles.
Running Time 20 minutes - not including bonus material.
Some content may not be suitable for young children.
Saturday, December 08, 2007
Ecard on HD Greetings
I created an ecard for the HighDef HD Greeting Holiday Contest. You can take a look at it here.
The card is available in English on the site, but if you'd like to send it with a different tag photo I've made a few different language versions. Right click on any of these images to save them to your computer and then when you are at the "personalize" menu when sending the card, choose to add a photo, and choose the alternate language photo you saved.


The card is available in English on the site, but if you'd like to send it with a different tag photo I've made a few different language versions. Right click on any of these images to save them to your computer and then when you are at the "personalize" menu when sending the card, choose to add a photo, and choose the alternate language photo you saved.


Friday, December 07, 2007
DVD is available
It's true! This is the link to the DVD store on Create Space. It will take about 2 weeks to appear on Amazon.com.
Here is a promotional clip I made for the DVD:
Here is a promotional clip I made for the DVD:
Sunday, November 25, 2007
DVD is coming soon! really!
I've sent the master DVD and artwork to CreateSpace and am waiting for the "proof" to approve. I'm quite happy with the way the DVD turned out, although I wouldn't be me if I didn't have some second thoughts about which films I put on it and which ones I left off -- but all in all, I think it has lots of good stuff on it and the people who have seen it have liked it. I will post the link when it is online and ready for sale!
Wednesday, October 31, 2007
Raccoon and Moose in Smoking Hearts
Here's what I've been up to for the past week! A new short clip for AnimWatch challenge 005 :
I entered rather late in the process so I didn't get any feedback, but that's ok. I like the way it turned out, even if it is a little bittersweet.
Update: My friend Jean Theberge gave me a bit of feedback on the camera positions, so I've made a few revisions on the character closeup shots and have updated the video on YouTube. Thanks to Jean for the feedback.
I entered rather late in the process so I didn't get any feedback, but that's ok. I like the way it turned out, even if it is a little bittersweet.
Update: My friend Jean Theberge gave me a bit of feedback on the camera positions, so I've made a few revisions on the character closeup shots and have updated the video on YouTube. Thanks to Jean for the feedback.
Sunday, October 21, 2007
Solargraphy image has been processed
Wow. What a pleasant surprise to see the image that is the result of a 3 month exposure from a pinhole camera that had been taped to my balcony (between June 21st and September 23rd). Here is the image that Tarja sent:

For more information about Solargraphy, visit Tarja's website www.solargraphy.com.
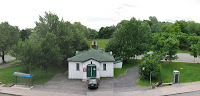
For reference, here is the image from my digital camera of what I thought the camera would capture:

For more information about Solargraphy, visit Tarja's website www.solargraphy.com.
For reference, here is the image from my digital camera of what I thought the camera would capture:

Thursday, October 18, 2007
DVD compilation testing
I've started getting help testing the DVD compilation master. My good friend Rick is testing it and hasn't found any technical issues. I was having one on my DVD set top player -- that the French subtitles were appearing by default, despite not having set them to appear for the disc. Simulation mode didn't have this problem, nor did playing the DVD on computers. I've since found a way around it by moving the French subtitles to track 2 and setting the disc subtitle to the empty track 1. I'm so happy when issues can be easily fixed. I've burned a new master and am waiting for the next tester I've asked to accept the challenge!
Thursday, October 11, 2007
DVD compilation ready for testing
whoo hooo. The DVD master is ready for testing. If you're in Montreal and want to test it for me please email tiger at smokingmoose dot com. There's about 30 minutes of material on it (not including the different language options). After it passes the testing phase I'll be sending it to CreateSpace.com -- but it will still take a few weeks for it to appear for sale on that site as well as on Amazon.
Friday, October 05, 2007
DVD is almost ready to release
I'm so close to closing the DVD compilation of my shorts. I'm really happy with the way it's turning out. I'm only doing NTSC for now. I'll have to see about PAL and what the easiest way to do it would be. I created all the artwork at 720x540, so it shouldn't be too big a deal.
I've been recording the Commentary, which I mistakenly thought would be easy. HA! I've got lots of stories to tell about each film, so it's not the content that's the problem, it's making it sound intelligent... recording it at the same time as watching the film is really hard. In fact, there were so many "uhms" and "ahhhs" the first time I recorded it, I laughed out loud. Maybe I should put 2 Commentary tracks -- the "improved" version and the funnier first take. Hmmm I don't think so.
If I have your email address, I will send a mooseletter soon to announce the availability of the DVD. And yes, to those of you in Montreal, I will have a screening soon. If you don't think I have your email and if you want to know about the DVD release or be invited to a screening in Montreal, send me an email (tiger at smokingmoose dot com).
I've been recording the Commentary, which I mistakenly thought would be easy. HA! I've got lots of stories to tell about each film, so it's not the content that's the problem, it's making it sound intelligent... recording it at the same time as watching the film is really hard. In fact, there were so many "uhms" and "ahhhs" the first time I recorded it, I laughed out loud. Maybe I should put 2 Commentary tracks -- the "improved" version and the funnier first take. Hmmm I don't think so.
If I have your email address, I will send a mooseletter soon to announce the availability of the DVD. And yes, to those of you in Montreal, I will have a screening soon. If you don't think I have your email and if you want to know about the DVD release or be invited to a screening in Montreal, send me an email (tiger at smokingmoose dot com).
Saturday, September 22, 2007
QuickTime Download - Prepare for Internet "Fast Start"
This is the second (if not third) time I've had trouble with getting QuickTime movies to "fast start" on download (and it pains me to say because I love QuickTime ;o) -- but I need to post something here, so I'll remember next time what I need to do to get it to work! Even though I save the movies in QuickTime pro, with the Fast Start flag toggled on, when I test downloading them, the Fast Start feature does not kick in; meaning that visitors get the big blue Q while waiting for the download, and unless they notice the "transferring" message in the status bar, they may think the download is not working.
I finally got it to work and am close to knowing why this is happening -- normally I compress the video and then use QuickTime Pro to enter the Movie info (copyright, description, keywords, etc) and use "save" -- it is possible that this is removing the Fast Start. The other possibility is that I really need to use "Fast Start - Compressed Header" via Compressor. The version that is working for me now, was created in Compressor with "Fast Start - Compressed Header" and I did not open it to re-save it in QuickTimePro with the additional Movie Info. I need to figure out how to add that via Compressor.
On to the DVD.
I finally got it to work and am close to knowing why this is happening -- normally I compress the video and then use QuickTime Pro to enter the Movie info (copyright, description, keywords, etc) and use "save" -- it is possible that this is removing the Fast Start. The other possibility is that I really need to use "Fast Start - Compressed Header" via Compressor. The version that is working for me now, was created in Compressor with "Fast Start - Compressed Header" and I did not open it to re-save it in QuickTimePro with the additional Movie Info. I need to figure out how to add that via Compressor.
On to the DVD.
Strange New Preview Teaser for My Smoking Moose Film
At the time I thought of it, it seemed like a good idea. Now when I look at the final result I find it a bit odd for a teaser for the film. I used XSI's Shape Manager for the pizza dough and for the first time it worked without errors. Another first was that I took advantage of Animation Layers in XSI 6.02 - this too worked -- I had one case of a crash, but once I knew what was causing it, I could work around it, and I can say that Animation Layers saved me a bunch of time ;o)
Anyway, here is the new teaser.
Anyway, here is the new teaser.
Thursday, September 13, 2007
This just in -- "Hysterical!!!"
I received an email from Jonny Lewis early this morning telling me he was at the screening in L.A. last night and that he thought my smoking moose film was "hysterical!!!" (3 exclamation marks according to Jonny). It was really nice of him to write and it makes me quite happy that someone who doesn't know me found it funny.
Wednesday, September 12, 2007
Tonight's the night!
I haven't been getting too excited about it, but tonight is the night my smoking moose film will make it's big premiere at the L.A. Shorts Festival. If you're in L.A. skip on over to the AMC Burbank theatre tonight at 9 pm to see it. AND if you do, please post some feedback.
Thanks to Floyd Bishop for giving it a shout out on newtoons.frederator.com
Thanks to Floyd Bishop for giving it a shout out on newtoons.frederator.com
Wednesday, August 08, 2007
LA Shorts Screening: Wednesday September 12, 2007 9 pm
The date has been confirmed, my smoking moose film, will premiere at the LA Shorts Film Festival on Wednesday September 12th, 2007 at 9:00 pm.
If you happen to be in L.A. and want to go, it will be playing at the:
AMC Burbank Town Center 6
770 N. First St.
Burbank, CA 91502
If you happen to be in L.A. and want to go, it will be playing at the:
AMC Burbank Town Center 6
770 N. First St.
Burbank, CA 91502
A new preview for my smoking moose film!
Finally! It seems like I've been working on this one forever ;o)
Thursday, August 02, 2007
Ottawa Festival says no, LA Shorts Festival says YES!
I found out a few days ago that the Ottawa Animation Festival had not selected my smoking moose film. They received more than 2,000 entries and select only 130 or so. I was a little disappointed for a few moments, but then remembered good things have come to my films through the Ottawa Festival despite not having been selected, so I will remain positive!
And on a positive note, the LA Shorts Festival has selected my smoking moose film for a special showcase screening. I'll post the time and date of the screening when I know it ;o)
And on a positive note, the LA Shorts Festival has selected my smoking moose film for a special showcase screening. I'll post the time and date of the screening when I know it ;o)
Monday, July 30, 2007
Jubeela photos
I was backing up and cleaning my systems the other day and I found a few photos I had prepared for Aniboom last winter. I don't think they ever posted them, so here they are:


Sunday, July 22, 2007
AnimWatch and Demo Reel

I'm working on my demo reel. I didn't have any lip sync on it and wanted to add some. Serendipitously I fell upon www.animwatch.com which has a animation contest that requires lip sync. Here is the QuickTime movie (starring Raccoon and Moose, of course ;o) but check it out -- they're not smoking !!!!)
You can see the other entries here.
For the demo reel, this only half cuts it for me ... it would be better to have an example of secondary shape animation for lip sync and so that is what I am working on now. I'm not totally convinced that I'll be able to achieve this with the current raccoon and moose geometry .. I'm working on it. Also, in animating this clip I had a lot of difficulty with rotations on the arm bones -- I don't remember having the problems when I was making the film (I was using XSI 4.2 and now I'm using XSI 6.01) -- I don't know if it's a bug in the software or if a setting has changed somewhere, but I'm going to have to figure out what is going on, 'cause it's really frustrating.
Friday, June 29, 2007
Official Date of Completion: June 28th, 2007
Whooo hoooo. It's official. The film was recorded onto HDCam 23.98 ndf videotape last night making the date of completion officially June 28th, 2007.
I'm going to the Jazz Festival tonight to celebrate!
On a side note, I've updated the products in the smoking moose store with new and improved images of the characters from the film.
I'm going to the Jazz Festival tonight to celebrate!
On a side note, I've updated the products in the smoking moose store with new and improved images of the characters from the film.
Tuesday, June 26, 2007
Long Lost My Bridge Videotape
I've wanted to do this for a while. I hope to do more, funnier ones. Here is the new XSI 6.01 rigged, enveloped and character key set animated smoking moose:
He looks like he's been drinking as well as smoking. I don't know when that happened ;o)
He looks like he's been drinking as well as smoking. I don't know when that happened ;o)
Sunday, June 24, 2007
Mirroring envelope points
Here are some things to remember about using symmetry maps and mirror weights for envelopes in XSI:
* must have one envelope (afaik the tools in XSI only allow you to mirror weights on the same envelope/geometry);
* create a symmetry map and template -- the map is found under the envelope weights and the template is found under the model -- the map contains information on how to apply the weights and the template contains information on what to apply the weights to;
* select the points that you want to mirror the weights of and choose Animate>Deform>Envelope>Mirror Weights;
* if you change the weighting of the points the change will not automatically be transferred to the symmetrical points -- you will need to select the weights and mirror the weights again.
You can also use symmetry maps while painting weights -- look up symmetry maps in the online help and click on for weight maps to display the help for Activating Symmetrical Painting.
* must have one envelope (afaik the tools in XSI only allow you to mirror weights on the same envelope/geometry);
* create a symmetry map and template -- the map is found under the envelope weights and the template is found under the model -- the map contains information on how to apply the weights and the template contains information on what to apply the weights to;
* select the points that you want to mirror the weights of and choose Animate>Deform>Envelope>Mirror Weights;
* if you change the weighting of the points the change will not automatically be transferred to the symmetrical points -- you will need to select the weights and mirror the weights again.
You can also use symmetry maps while painting weights -- look up symmetry maps in the online help and click on for weight maps to display the help for Activating Symmetrical Painting.
Friday, June 22, 2007
XSI 6 - Character Key Sets / Sub-Key Sets
A note about using Character Sub-Key Sets -- in order to create or edit a sub-key set you need to set the current Key Set or Sub Key Set first -- this is the last item of the Character Key menu -- if you don't do this and try creating character sub-key sets (after "selecting" the set that you want to add it under) either nothing will happen or you will get an error message that says Type was nothing -- if you open the script editor log you'll see this (which is a clue that the character set is missing from the command, and that "selecting" it, isn't what you need to do):
' INFO : Must receive Character Set as first parameter
' INFO : Type was Nothing
Here is a screengrab :
' INFO : Must receive Character Set as first parameter
' INFO : Type was Nothing
Here is a screengrab :

Thursday, June 21, 2007
Pinhole camera and Solargraphy
This has nothing to do with the smoking moose, but might be of interest to anyone reading this blog. My friend Loren Williams, a wonderful photographer, gave me a pinhole camera (made out of/in a 35mm black plastic film canister) to attach to my balcony to take part in Tarja Trygg´s Solargraphy project. Loren received a few pinhole cameras from Finland and has distributed them across Canada. I taped the camera to my balcony this morning (June 21st, Summer Solstice) and uncovered the lens at 10h30 a.m. (Eastern Daylight Time)
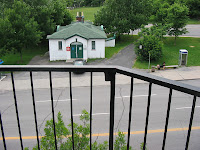
Here are reference photographs from my digital camera:
Photo of the pinhole camera taped to my balcony :
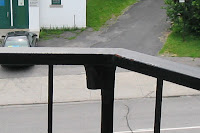
plus close up (just in case you don't notice the "camera":
Here is a chopped together wide angle of what the camera might be recording:
The camera will stay in place for 3 months (as long as the condo association doesn't ask me to remove it). The pinhole will then be covered and I'll give the camera back to Loren, who will send it to Finland for processing. Hopefully a nice image of the pattern of the sun will be created.
Here are reference photographs from my digital camera:
Photo of the pinhole camera taped to my balcony :

plus close up (just in case you don't notice the "camera":

Here is a chopped together wide angle of what the camera might be recording:
The camera will stay in place for 3 months (as long as the condo association doesn't ask me to remove it). The pinhole will then be covered and I'll give the camera back to Loren, who will send it to Finland for processing. Hopefully a nice image of the pattern of the sun will be created.
Monday, June 18, 2007
Decisions, decisions, decisions
The crazy thing about submitting films to festivals is not only trying to choose a festival that is appropriate for your specific film but also making sure that you can meet the requirements of the festival you submit to. I've recently decided not to submit to the Festival du Nouveau Cinema, partly because I'm not so sure it is a good fit for my film, but mostly because I would need to make a 2nd digiBeta master for the subtitled version (or have professional subtitles done) and I just don't have the cash (or the energy to own more master video tapes). There are 2 other events in Montreal around the same time that I will submit the film to. Of course I will keep the subtitled version that I've done for the DVD.
Tomorrow I'm going to drop of my disk drive at Vision Globale so that they can make me a digiBeta master videotape. That will mean the date of completion is near (might be tomorrow or Wednesday!). I need to decide how many digiBeta copies to make and how many BetaSP copies to make.
By the way, the new web site is live and I really like it ;o) It's kind of crazy -- it is basically one html page -- with the exception of one or two pop ups and a few pdfs that will also pop up (depending on your browser pdf setting).
I've also installed the new version of Softimage XSI (6.01) and am re-rigging the moose. Using the Rig from Biped Guide makes the rigging so much easier and creates such a better rig than I could create drawing skeletons (mostly for the feet but also for the hips and upper body). The tediuous part though is still the enveloping and although it's looking pretty good I think I need to spend a few more hours on it. Next will be to set up character key sets (new in 6.?) and then animate a teaser (the reason to re-rig the moose -- although getting up to speed in xsi 6 won't hurt me a bit!).
Tomorrow I'm going to drop of my disk drive at Vision Globale so that they can make me a digiBeta master videotape. That will mean the date of completion is near (might be tomorrow or Wednesday!). I need to decide how many digiBeta copies to make and how many BetaSP copies to make.
By the way, the new web site is live and I really like it ;o) It's kind of crazy -- it is basically one html page -- with the exception of one or two pop ups and a few pdfs that will also pop up (depending on your browser pdf setting).
I've also installed the new version of Softimage XSI (6.01) and am re-rigging the moose. Using the Rig from Biped Guide makes the rigging so much easier and creates such a better rig than I could create drawing skeletons (mostly for the feet but also for the hips and upper body). The tediuous part though is still the enveloping and although it's looking pretty good I think I need to spend a few more hours on it. Next will be to set up character key sets (new in 6.?) and then animate a teaser (the reason to re-rig the moose -- although getting up to speed in xsi 6 won't hurt me a bit!).
Tuesday, June 12, 2007
Preparing to transfer to video
The sound is done. Thanks to Serge at Net Post Production, who designed better sound effects than I had, recorded foley and mixed a much better mix of all the tracks. Thanks Serge!
Next up is the transfer to video. Today I'm backing all the video and sound stuff up and then I'll export the final picture to take to Vision Globale to transfer.
In the meantime I've also been submitting to festivals, and working on a new web site which is about to go live. I'll need to update this blog to make it match the new site.
I've also installed XSI 6.01 so I can start working with the characters again for promo shots.
Next up is the transfer to video. Today I'm backing all the video and sound stuff up and then I'll export the final picture to take to Vision Globale to transfer.
In the meantime I've also been submitting to festivals, and working on a new web site which is about to go live. I'll need to update this blog to make it match the new site.
I've also installed XSI 6.01 so I can start working with the characters again for promo shots.
Tuesday, June 05, 2007
Wednesday, May 30, 2007
h264 rocks
Wow. Today I was preparing files to take to a sound engineer who has agreed to critique my sound mix. He recommended that I bring the film as a QuickTime H264 movie and the final mix on a data CD. When I first exported the H264 movie using the default settings, the file size was huge, so I reduced the bit rate in half, thinking there would be a reduction in quality. and being a bit apprehensive because of the amount of time it takes to export the movie. Well I was wrong about the quality and it was certainly worth the 2 hour export time. I now have a 1280x720 QuickTime H264 that weighs in at 265 mb, that looks beautiful (and the mix sounds pretty good too -- but that is really for my sound engineer to judge ;o).
I've also been preparing the documentation and promo stuff for festivals and looking at the various festivals in which to enter the film. It feels like an uphill battle because it will be rejected from most -- in fact this is the statistic -- most films only make it into 25% of festivals they are submitted to. Knowing that it was rejected 5 times from funding agencies isn't helping my motivation right now. Reading all the rules and figuring out the deadlines and whether I can afford the projection format requirement they want and the publicity materials ... ughh it's a bit overwhelming. I'm hoping that once I get a complete package done, it will only be a matter of duplicating it. Next up is to create media screeners and a poster.
Anyhow, I have lovely DVD covers and labels waiting to be affixed to the DVDs. Here is a postcard that I'm working on:

_
I've also been preparing the documentation and promo stuff for festivals and looking at the various festivals in which to enter the film. It feels like an uphill battle because it will be rejected from most -- in fact this is the statistic -- most films only make it into 25% of festivals they are submitted to. Knowing that it was rejected 5 times from funding agencies isn't helping my motivation right now. Reading all the rules and figuring out the deadlines and whether I can afford the projection format requirement they want and the publicity materials ... ughh it's a bit overwhelming. I'm hoping that once I get a complete package done, it will only be a matter of duplicating it. Next up is to create media screeners and a poster.
Anyhow, I have lovely DVD covers and labels waiting to be affixed to the DVDs. Here is a postcard that I'm working on:

_
Wednesday, May 23, 2007
testing the DVD
I made a first test DVD last night and made fixes to the DVD menus today. I've tested the sound mix on a few different systems in house, but still need to go to a sound studio and have a professional check my levels. Then I can go to the video house and have the digiBeta and betaSP tapes made. I'm only going to make NTSC tapes for now (unless the Video house convinces me that it would be more cost effective to do PAL at the same time -- we'll see).
The Festival de Nouveau Cinema requires subtitles in French and I'm not sure what the best way is to do that. I started to add them in Final Cut Pro, but I stopped myself and got back on my priorities (the FNC deadline is June 15th so I have time to decide what to do). An option other than subtitles in FCP might be to record a French dialogue track and have the Video house make a digiBeta with the French sound track, of course then they might want English subtitles. I'll need to check the rules again. In the meantime, I can always translate the dialogue into French.
I had wanted to animate the end credits, but I've left them with still images. I think it'll be ok. I've just gotta get this thing out the door.
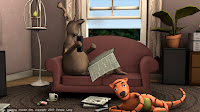
Here are a few screen shots to wet your appetite:
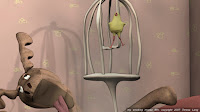
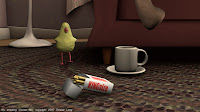
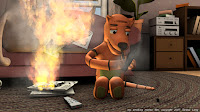
The Festival de Nouveau Cinema requires subtitles in French and I'm not sure what the best way is to do that. I started to add them in Final Cut Pro, but I stopped myself and got back on my priorities (the FNC deadline is June 15th so I have time to decide what to do). An option other than subtitles in FCP might be to record a French dialogue track and have the Video house make a digiBeta with the French sound track, of course then they might want English subtitles. I'll need to check the rules again. In the meantime, I can always translate the dialogue into French.
I had wanted to animate the end credits, but I've left them with still images. I think it'll be ok. I've just gotta get this thing out the door.
Here are a few screen shots to wet your appetite:


Wednesday, May 16, 2007
every day I get a bit closer
The cough is done and is better. I have a test version of the sound mix that I'm burning to CD to double check on my stereo -- I'll still need to double check the final on "real" studio monitors, but this should tell me how close I am. I encountered a software crash in SoundTrack Pro exporting the "real" mix. I can work around it by not using the mixer but just animating (they call it "automating") the levels in the individual tracks rather than through busses -- it'll be a bit more finicky work but that's ok -- hopefully only one more day of "mixing".
So tonight I'm encoding a test MPEG 2/AC-3 to see what it will look and sound like on DVD.
To top it off, I noticed a color pop on the window -- I couldn't believe it -- I was sure I had fixed all the window issues. Anyhow, not to worry, I've rendered a few more window "frames" ;o) to fix it and am re-compositing the 400 frames now ... I had considered just ignoring it, but I spent so much time trying to get it right, I would have been sad. I hope it's really fixed this time.
I'm also working on the DVD menu (background image) and it's looking pretty good -- I just need to get the buttons done.
So tonight I'm encoding a test MPEG 2/AC-3 to see what it will look and sound like on DVD.
To top it off, I noticed a color pop on the window -- I couldn't believe it -- I was sure I had fixed all the window issues. Anyhow, not to worry, I've rendered a few more window "frames" ;o) to fix it and am re-compositing the 400 frames now ... I had considered just ignoring it, but I spent so much time trying to get it right, I would have been sad. I hope it's really fixed this time.
I'm also working on the DVD menu (background image) and it's looking pretty good -- I just need to get the buttons done.
Saturday, May 12, 2007
Sound and more sound
I've re-recorded the dialogue and am hoping that it is a bit funnier. I've added a bit at the end, that I don't want to be too specific about (I don't want to give it away), but I'm having difficultly deciding which take to use -- there are 2 that could be funny to different people. I may need to get a second opinion on it.
The only other sound track that I'm really not satisfied with yet is the moose's cough. So I've just ruined my voice by recording the cough and am now about to splice it up and slip it in and see if it works better. In order to get a good cough I did the number one thing singers are not supposed to do -- I ate dairy products. I'm amazed but it really worked. I suppose I could have taken up smoking ... hmm, if these takes don't work, maybe I'll go buy a pack of smokes.
On another note, Rick May has finished his short animated film. I can't wait to see it. He has gone through pretty much everything I have -- he even has a recent post about aspect ratios ;o) He did the smart thing and used a render farm service.
The only other sound track that I'm really not satisfied with yet is the moose's cough. So I've just ruined my voice by recording the cough and am now about to splice it up and slip it in and see if it works better. In order to get a good cough I did the number one thing singers are not supposed to do -- I ate dairy products. I'm amazed but it really worked. I suppose I could have taken up smoking ... hmm, if these takes don't work, maybe I'll go buy a pack of smokes.
On another note, Rick May has finished his short animated film. I can't wait to see it. He has gone through pretty much everything I have -- he even has a recent post about aspect ratios ;o) He did the smart thing and used a render farm service.
Wednesday, May 09, 2007
moosic is done, well ...
Ok, the music has been finalized, recorded and sent over to SoundTrackPro. It all fits nicely with the picture. I'm not 100% satisfied with one instrument on one track, but I don't have any bright ideas right now of what would make it better. It is possible that in the mix it won't bother me so much. If it does, I can play with different instruments later, as long as the timing doesn't change (and it won't)!
Now I'm finalizing the sound edit and getting ready for the mix.
It still feels strange not to be rendering.
I've also started to prepare the DVD assets. I had forgotten how much fun making DVDs is. I'm being a bit sarcastic here -- Although I love making the menus and buttons, especially making unique/fun buttons -- what I don't like is standard definition video and non-square pixels and aspect ratios stuff. I have only seen HD listed as a possible DVD submission type in the requirements of one film festival .. all the rest are NTSC or PAL, so I'm stuck with dealing with that. I can only burn SD DVDs here anyway.
Now I'm finalizing the sound edit and getting ready for the mix.
It still feels strange not to be rendering.
I've also started to prepare the DVD assets. I had forgotten how much fun making DVDs is. I'm being a bit sarcastic here -- Although I love making the menus and buttons, especially making unique/fun buttons -- what I don't like is standard definition video and non-square pixels and aspect ratios stuff. I have only seen HD listed as a possible DVD submission type in the requirements of one film festival .. all the rest are NTSC or PAL, so I'm stuck with dealing with that. I can only burn SD DVDs here anyway.
Saturday, May 05, 2007
Sound edit and music
Currently (still) working on the sound edit and music. I've been using SoundTrack Pro for the edit, but I am seriously considering switching to ProTools. The limitation of SoundTrack Pro that is driving me nuts is that I can't edit all the tracks simulataneously, so if I make a tweak to the picture edit,I need to adjust all the tracks individually, rather than being able to select them all and insert or cut out time. This is one of those times where I think "I can't believe the software doesn't do this". Of course I'd have the same problem if I were editing magnetic tape on a Steenbeck, but this is computer software for goodness sake.
It is strange not to be rendering or compositing. For the first time in more than a year, I actually turned my PC off for a while. It's nice to work on my laptop, partly because I can take it downstairs where it is not so hot and I don't have to run the air conditioning.
It is strange not to be rendering or compositing. For the first time in more than a year, I actually turned my PC off for a while. It's nice to work on my laptop, partly because I can take it downstairs where it is not so hot and I don't have to run the air conditioning.
Sunday, April 29, 2007
Relief
"On the 29th April Moscow was washed clean by a thunderstorm. The air was delightful: it mellowed the heart and made one want to start living again."
-- Mikhail Bulgakov, Black Snow. Translated by Michael Glenny.
Black Snow is a wonderful novel about the process of writing a play and having a theatre produce it. I've just re-read it and have enjoyed it more this time as I can relate the main character's thoughts about writing a play to the process of making and releasing an animated film ;o)
The smoking moose film is now composited. There are a few small compositing glitches, but I've gone ahead and created the uncompressed QuickTime movies and have started the "final" edit in Final Cut. I've also made a backup of the "final" scene files and rendered pictures, which is a relief because I was worried about losing months of rendered files if the disk had crashed.
-- Mikhail Bulgakov, Black Snow. Translated by Michael Glenny.
Black Snow is a wonderful novel about the process of writing a play and having a theatre produce it. I've just re-read it and have enjoyed it more this time as I can relate the main character's thoughts about writing a play to the process of making and releasing an animated film ;o)
The smoking moose film is now composited. There are a few small compositing glitches, but I've gone ahead and created the uncompressed QuickTime movies and have started the "final" edit in Final Cut. I've also made a backup of the "final" scene files and rendered pictures, which is a relief because I was worried about losing months of rendered files if the disk had crashed.
Thursday, April 26, 2007
so close and yet so far and where's Batty?
There are only a few more frames rendering and a few more to composite ... in the meantime the soundtrack is coming along. The moose's cough is better (using Sound Track Pro's EQ channel editor gives a much better result that trying to match pitch using the pitch editor) and I've added a bunch more subtle sound effects that add to the general atmosphere. I'll need to make a few adjustments for synchronization purposes to the music but I need to wait until after I've finished compositing because the compositor takes over the PC's CPU.
In anticipation of finishing the film, I've downloaded XSI 6.01! But I'm not installing it until I've finished the renders and composites. In theory you can run previous versions with the latest version on the same system, but I'm not taking any chances. I'm excited about using some of the new animation features to animate a few teasers for the film.
The title/credit design is still worrying me. Right now it is very basic and in the past I've always created much more creative titles. Hopefully I'll come up with something by the time I'm finished with everything else.
On another note, I went to the Red Bird Studio tonight where Stickey Hickee was showing off their artwork - they are a wonderful bunch of artists who draw comics. Really, really nice, heartwarming, art, even if Batty wasn't there.
In anticipation of finishing the film, I've downloaded XSI 6.01! But I'm not installing it until I've finished the renders and composites. In theory you can run previous versions with the latest version on the same system, but I'm not taking any chances. I'm excited about using some of the new animation features to animate a few teasers for the film.
The title/credit design is still worrying me. Right now it is very basic and in the past I've always created much more creative titles. Hopefully I'll come up with something by the time I'm finished with everything else.
On another note, I went to the Red Bird Studio tonight where Stickey Hickee was showing off their artwork - they are a wonderful bunch of artists who draw comics. Really, really nice, heartwarming, art, even if Batty wasn't there.
Sunday, April 15, 2007
ah zoot alors
My test composites missed some errors and there was a transform problem on the fire in scene 3 -- I'm making the corrections now and will need to relaunch the composites. One of the errors (which I've encountered before as well) is caused by having different maximum sampling values on different passes -- I'm guessing that I didn't remember to boost the max sampling back up to 2 (luckily not all frames are affected, so I'm only re-rendering the frames that are affected).
Still the end is near ;o)
Still the end is near ;o)
Friday, April 13, 2007
Rendering is DONE! Compositing NOW!
Whoo hoo. my smoking moose film is now compositing! Meanwhile I'm working on the soundtrack and credits.
I'm only wishing the animals I liked weren't so big. Here's a girl who turned a stuffed beaver into a computer ... hmm maybe I should say she re-stuffed a stuffed beaver with a computer.
I'm only wishing the animals I liked weren't so big. Here's a girl who turned a stuffed beaver into a computer ... hmm maybe I should say she re-stuffed a stuffed beaver with a computer.
Tuesday, April 10, 2007
window
ok "stupid" window is more like it. I lost the highlight for the second part of scene 3 -- if I get it to work, I lose the highlight on the canary OR the matte that's cutting out the sofa on the window highlight comes back. I'm not sure how I've done it, but I think I've gotten around it... although I had to add another canary highlight to make it work and I had to adjust the tiger highlight.
The other thing I fixed today was the Raccoon's cigarette smoke (exhale and rising) which looked strange in some frames when it appeared on top of the pizza box. At first I tried to use a painted vector shape to matte it out, and although I proudly got this working correctly (animated shapes and all), for some reason it messed up the smoke when it did appear outside the pizzabox -- it messed it up in a strange way -- it was darker and had black streaks in it. So I went back to my regular method of rendering a matte pass -- it didn't take too long and it's done.
The other thing I fixed today was the Raccoon's cigarette smoke (exhale and rising) which looked strange in some frames when it appeared on top of the pizza box. At first I tried to use a painted vector shape to matte it out, and although I proudly got this working correctly (animated shapes and all), for some reason it messed up the smoke when it did appear outside the pizzabox -- it messed it up in a strange way -- it was darker and had black streaks in it. So I went back to my regular method of rendering a matte pass -- it didn't take too long and it's done.
I think this is it!
I have just launched what I hope is the last test composite of scene 3, the mega multi frame multi passes craziness. The window caused me the most problems. Interestly enough, the window was was inspired by the Polish 1982 Oscar winning short film called Tango by Zbigniew Rybczynski, where everything happened in one room and started with a ball coming through the window, followed by a boy. The film continued to show multiple layers and stories in that one room. Much like the moose film and yet so different too. I doubt anyone will see the inspiration. Anyhow I think I've got compositing of the window and the characters who go out of it working. There are still rendering and compositing "mistakes" but I am leaving them, I don't think there is anything drastic that will kill the film.
For the compositing tests, I am rendering every 24th frame at 1/4 of the resolution, so I suppose there could be a surprise when I render every frame at full resolution, but hopefully those surprises can be corrected in photoshop or fixed with a second composite.
In the meantime, I've also made good progress on a redesign of the smokingmoose website, it will go live when the film is finished and available on DVD. I will release a DVD containing only the moose film as soon as possible, but the idea has always been to release a DVD of a compilation of most of my animated films (I'll leave the bad ones off ;o). The compilation will take a little longer to produce, as I need to get the previous films digitized to uncompressed QuickTime movies.
For the compositing tests, I am rendering every 24th frame at 1/4 of the resolution, so I suppose there could be a surprise when I render every frame at full resolution, but hopefully those surprises can be corrected in photoshop or fixed with a second composite.
In the meantime, I've also made good progress on a redesign of the smokingmoose website, it will go live when the film is finished and available on DVD. I will release a DVD containing only the moose film as soon as possible, but the idea has always been to release a DVD of a compilation of most of my animated films (I'll leave the bad ones off ;o). The compilation will take a little longer to produce, as I need to get the previous films digitized to uncompressed QuickTime movies.
Monday, April 02, 2007
Fxtree: Composite node: Output Size Mode
After transforming effects to use through a composite node (over or math), you can easily crop to the background by setting the Output size node to Use Default Image on the Output tab.
I had been using the psd blend addon but have stopped using it as the "Place Output Image at Origin" is not working consistently and my attempts to use the Output Size Node parameter don't work with the psd blend node. This is unfortunate since the psd blend addon has more compositing options than the math composite (or perhaps they are just easier for me to use as I am used to photoshop).
As promised here is snapshot of the current state of scene 3's fxtree. It is crazy, but it is almost working! I'm having trouble matting some things, I've been attempting to reuse passes into the matte connection of composite nodes and while this is working in most cases, its not working for the fire. I'll need to render a matte for the tiger and canary for the frames when they are in front of the fire.

I had been using the psd blend addon but have stopped using it as the "Place Output Image at Origin" is not working consistently and my attempts to use the Output Size Node parameter don't work with the psd blend node. This is unfortunate since the psd blend addon has more compositing options than the math composite (or perhaps they are just easier for me to use as I am used to photoshop).
As promised here is snapshot of the current state of scene 3's fxtree. It is crazy, but it is almost working! I'm having trouble matting some things, I've been attempting to reuse passes into the matte connection of composite nodes and while this is working in most cases, its not working for the fire. I'll need to render a matte for the tiger and canary for the frames when they are in front of the fire.

Thursday, March 29, 2007
promo image of the moose

Ok, so the film isn't available on DVD yet, but it will be soooooo soooooon ;o)
recentering audio to 0 in SoundTrackPro
Sometimes an audio recording is not centered at 0. To fix this in SoundTrack Pro, switch from Actions to Analysis, expand Analysis type, check DC_Offset and click Analyse. Then select the item on the list below and press Fix.
Tuesday, March 27, 2007
Smoke and Fire
Everything is rendered and composited and unless there are some hidden compositing issues I am almost ready to press the final composite button ;o) The last thing that I'm tweaking is the smoke and fire on the sofa. The start of it is great, but it's not working when the emitter on the sofa is scaled. I've just switched from having 1 emitter on the sofa to having 3 and it looks good in the render region. I also removed the collision that I had set up to the sofa geometry, I'm hoping that this is what was causing the fire to take so long to render.
Anyway, here goes to launching the smoke and fire renders and hoping that will be it!
Anyway, here goes to launching the smoke and fire renders and hoping that will be it!
Tuesday, March 20, 2007
Fire crashing
hmm this is the second time I've had trouble rendering a fire particle pass (using sprites). Rendering from the command line would render 2 or 3 frames and then the window would close. Rendering interactively would crash XSI. The first time this happened a few months ago I changed the sprite (just by duplicating it and changing its name). Today changing the sprite didn't solve the issue. Today's solution was to duplicate the entire PType (I have 2 emitters that were using the same Ptype). I saved the PType preset and applied it to the second emitter. The color animation on the Ptype didn't get saved :o( so I copied the animation from the original ptype to the duplicate. The pass is now rendering more than 2 frames again from the command line.
Sunday, March 18, 2007
rendering and compositing
Yes the smoking moose film is still in progress. I'm still rendering and compositing however I have started to finalize the sound track because I believe the picture is locked. I needed to add a few highlights and shadows -- these are rendering now. Next I need to render a few tweaks to the fire and smoke (but these are quite close to final). I'm not 100% happy with the water so that is next on my list of fixes.
I will post a picture of scene 3's fxtree soon. It is completely insane and although I'm sure there would be a better way to composite it, I am just making it work to get the film done ;o)
I will post a picture of scene 3's fxtree soon. It is completely insane and although I'm sure there would be a better way to composite it, I am just making it work to get the film done ;o)
creating QuickTime movies for Flash Video
The sync of the FLash Video of my Eyedoll video is much better. After struggling with the Raccoon animation I did for Strut your Reel (and blaming it on Flash video ;o) I did a bit more research on Flash Video encoding and found this article on the Adobe site which helped a lot. Although it recommends using a frame rate of 15 or 12 fps, I stuck with 30 fps (the original animation was at 24fps and I used the retime linear tool in the fxtree to retime the rendered pics). The big piece of the puzzle though is the data rate, which for some reason I had ignored when encoding the raccoon. Big mistake, I'm pretty certain that is what is causing the bad sync.
I might try 15 or 12 fps next time I do one of these things. Especially since that will mean fewer frames to render ;o)
I might try 15 or 12 fps next time I do one of these things. Especially since that will mean fewer frames to render ;o)
Just a Little Bug
Here's something I did for the AniBOOM's Eyedoll contest. If you like it, head on over to AniBOOM to vote for it!
Thursday, February 22, 2007
happy new year of the golden pig

Another new year to celebrate!
There are no golden pigs in my smoking moose film, which is, still in-progress. It's moved into the compositing stage, although I still have FX passes to render for the huge scene 3, I'm trying to get the rendering and compositing of the room and characters done and then I'll add the Smoke, Fire and Water passes.
Wednesday, January 31, 2007
Strutyourreel.com 10 second contest
Here's my entry to January's Strut your reel animation contest.
The animation was the easy part! The sync is a bit off on YouTube which I am blaming on the conversion process. The first version I uploaded was completely out-of-sync, I believe because I had animated it at 24 fps. I switched to 29.97 and then to 30 fps and it is better, but after uploading many different versions of 30 fps I realized that I could upload the same clip but the sync would be a bit different after the conversion. That said, the best results seemed to be with: 30fps source, converting the sound to mp3, exporting a .mp4 file using the MPEG-4 Codec (although uploading the same clip twice still resulted in slightly different audio synchronisation).
You can see all the entries at strutyourreel
The animation was the easy part! The sync is a bit off on YouTube which I am blaming on the conversion process. The first version I uploaded was completely out-of-sync, I believe because I had animated it at 24 fps. I switched to 29.97 and then to 30 fps and it is better, but after uploading many different versions of 30 fps I realized that I could upload the same clip but the sync would be a bit different after the conversion. That said, the best results seemed to be with: 30fps source, converting the sound to mp3, exporting a .mp4 file using the MPEG-4 Codec (although uploading the same clip twice still resulted in slightly different audio synchronisation).
You can see all the entries at strutyourreel
Friday, January 12, 2007
fcurve madness
When fixing animation always remember to double check fcurves. Two things have recently driven me mad!
(a) on curves using spline interpolation if 2 keyframes are of the same value make sure that you use plateau slopes so that the value between the 2 keyframes does not exceed the 2 keyframes;
(b) if you retime animation make sure that there are no keyframes that are not on frames -- this can be achieved by selecting the keyframes and choosing "move keys to nearest frames". However, this may not work IF there is already a keyframe on the nearest frame and you may end up with a keyframe immediately before or after... if you're working in the dopesheet you won't see this stray keyframe
So the lesson of the day is, if you have movement where you don't expect there to be movement, double check the fcurves for the slope between frames and for extra keys between frames.
(a) on curves using spline interpolation if 2 keyframes are of the same value make sure that you use plateau slopes so that the value between the 2 keyframes does not exceed the 2 keyframes;
(b) if you retime animation make sure that there are no keyframes that are not on frames -- this can be achieved by selecting the keyframes and choosing "move keys to nearest frames". However, this may not work IF there is already a keyframe on the nearest frame and you may end up with a keyframe immediately before or after... if you're working in the dopesheet you won't see this stray keyframe
So the lesson of the day is, if you have movement where you don't expect there to be movement, double check the fcurves for the slope between frames and for extra keys between frames.
Thursday, January 04, 2007
RGBA Matte Pass - override ignored if color correction node exists in render tree
One of the comments I received regarding the film was that the carpet didn't have enough resolution. I was simply using a low res texture of a braided rug and had become used to it. Since I didn't have a high res texture I've been testing various methods of creating a higher resolution carpet and have tried a number of different ways (including modeling the braid and using skeletons to wrap it into a rug -- which was way too big of a model to actually use and didn't end up looking that good ;o). I also tried painting a photoshop image (with painted bump map) -- this method looked great in the small tests that I did but when I made the large final rug -- it didn't look so great. Finally I ended up using the fabric procedural shader and after lots of tweaking I have something that I think is acceptable, although I have to give up on the braided rag rug look and accept a rug look.
Now that I've got the rug geometry I thought I could just render it in a RGBA matte pass and composite it into the other renders. However, when I made the matte pass (using the preset) -- the characters appeared in the render in full RGB - while the rest of the objects were as expected rendered in black.
After a bit of searching I discovered that this was being caused by having extra nodes in the render trees -- on 2 of the characters I had a color correction and on another I had a intensity change. Removing these and recreating the pass gives me the pass as I would like it to be. However, this will cause a problem when/if I need to re-render any of the characters as they will no longer match the other frames.
For scenes 1 and 2, since I need to re-render the beauty pass anyway, I'll just add the new carpet to the beauty pass. Scene 3 will be a bit more of a problem.
I'm still using XSI 4.2 so this is possibly fixed in a more recent version.
Now that I've got the rug geometry I thought I could just render it in a RGBA matte pass and composite it into the other renders. However, when I made the matte pass (using the preset) -- the characters appeared in the render in full RGB - while the rest of the objects were as expected rendered in black.
After a bit of searching I discovered that this was being caused by having extra nodes in the render trees -- on 2 of the characters I had a color correction and on another I had a intensity change. Removing these and recreating the pass gives me the pass as I would like it to be. However, this will cause a problem when/if I need to re-render any of the characters as they will no longer match the other frames.
For scenes 1 and 2, since I need to re-render the beauty pass anyway, I'll just add the new carpet to the beauty pass. Scene 3 will be a bit more of a problem.
I'm still using XSI 4.2 so this is possibly fixed in a more recent version.
Tuesday, December 26, 2006
another year over, a new one on the way!

Happy Holidays!
Film Update:
I've stopped rendering the film in order to work on my demo reel. I'm looking for a job as an animator (using XSI in preference ;o). If anyone knows of an opportunity please email me : tiger at smokingmoose dot com.
Sunday, December 03, 2006
tweaking final gathering settings
My small render (250x141) is completed and composited, sent out for feedback and feedback received. Between the time I sent it out and received feedback I started the final res render (1280x720) and discovered to my horror that the final gathering pass was taking up to 23 minutes a frame to render. I went back in to the render settings to tweak them.
Here is a resume what Dave Lajoie wrote in a pdf about final gather settings (I think the pdf is from XSI 3.0 release -- some of the settings are no longer named the same -- you can get it here) :
"So to recap on FG accuracy and radius, [...] here are the different combinations and permutations:
• When Radius is small (0.01-0.2) and Accuracy is high (1000-3000), the render speed is the slowest but the render quality is the best. Usually these settings are suggested to remove FG flickering. Since each frame contains a lot of FG samples, it is suggested that you rebuild the FG map at each frame. Otherwise the FG map file will grow too rapidly and the renderer will run out of memory.
• When Radius is Large (1-100) and Accuracy is High (1000-3000), render speed is a little faster. This combination is perfect for smoothing out the FG result, giving the rendered image a more blurry effect. Again it is suggested that you rebuild the FG map at each frame since the FG accuracy is high.
• When the Radius is small (0.01-0.2) and Accuracy is low (100-500), the FG result is poor. I suggest that you use this combination only for preview purposes.
• Lastly, when the Radius is large (1-100) and Accuracy is low (100-500), the FG settings are ideal for an Image based lighting pass, as long as the image used for the lighting pass doesn’t contain too much high frequency detail. It is strongly suggested that you blur the image that you use for the image based lighting pass, since this allows you to use low Accuracy and a large Radius, which will, in turn, save precious rendering time.
Very important to remember:
If Radius is small, Accuracy needs to be high.
If Radius is large, Accuracy can be lowered."
For my smoking moose purposes I chose the 4th option - large radius and low accuracy using image based lighting. The min radius is set to 20, the max to 50, the accuracy is set to 100 and the filter is set to 1. I'm using a constant image for the image based lighting pass as well as a few constant color cards to bounce rays off. Since I'm also rendering a dirtmap pass I can get away with the larger radius and lower accuracy.
Also, Dave's pdf mentioned that high frequency textures should use lower radius and higher accuracy -- the braided rag rug is a very high frequency texture -- this could explain the high render times. So I used a trick mentioned in the pdf:
"Another trick which can save a lot of time is to use a ray_type shader, which allows you to use two different rendertrees, one for camera rays and one for Final Gathering rays. With this approach you can use a simpler rendertree to remove high frequency from the surrounding object’s surface."
The FG render pass is down to 2 to 6 minutes per frame! Of course the other passes also take time, so the total combined render time is higher than 6 minutes, but it's still a lot less than if I had continued rendering the FG pass with low radius and high accuracy!
The "rebuild" options refer to the Final Gathering Map and have changed since the pdf was written. I'm using XSI 4.2 and the options I have are:
Thanks to Dave wherever you are!.
Now on to fixing some of the stuff I received feedback on.
Here is a resume what Dave Lajoie wrote in a pdf about final gather settings (I think the pdf is from XSI 3.0 release -- some of the settings are no longer named the same -- you can get it here) :
"So to recap on FG accuracy and radius, [...] here are the different combinations and permutations:
• When Radius is small (0.01-0.2) and Accuracy is high (1000-3000), the render speed is the slowest but the render quality is the best. Usually these settings are suggested to remove FG flickering. Since each frame contains a lot of FG samples, it is suggested that you rebuild the FG map at each frame. Otherwise the FG map file will grow too rapidly and the renderer will run out of memory.
• When Radius is Large (1-100) and Accuracy is High (1000-3000), render speed is a little faster. This combination is perfect for smoothing out the FG result, giving the rendered image a more blurry effect. Again it is suggested that you rebuild the FG map at each frame since the FG accuracy is high.
• When the Radius is small (0.01-0.2) and Accuracy is low (100-500), the FG result is poor. I suggest that you use this combination only for preview purposes.
• Lastly, when the Radius is large (1-100) and Accuracy is low (100-500), the FG settings are ideal for an Image based lighting pass, as long as the image used for the lighting pass doesn’t contain too much high frequency detail. It is strongly suggested that you blur the image that you use for the image based lighting pass, since this allows you to use low Accuracy and a large Radius, which will, in turn, save precious rendering time.
Very important to remember:
If Radius is small, Accuracy needs to be high.
If Radius is large, Accuracy can be lowered."
For my smoking moose purposes I chose the 4th option - large radius and low accuracy using image based lighting. The min radius is set to 20, the max to 50, the accuracy is set to 100 and the filter is set to 1. I'm using a constant image for the image based lighting pass as well as a few constant color cards to bounce rays off. Since I'm also rendering a dirtmap pass I can get away with the larger radius and lower accuracy.
Also, Dave's pdf mentioned that high frequency textures should use lower radius and higher accuracy -- the braided rag rug is a very high frequency texture -- this could explain the high render times. So I used a trick mentioned in the pdf:
"Another trick which can save a lot of time is to use a ray_type shader, which allows you to use two different rendertrees, one for camera rays and one for Final Gathering rays. With this approach you can use a simpler rendertree to remove high frequency from the surrounding object’s surface."
The FG render pass is down to 2 to 6 minutes per frame! Of course the other passes also take time, so the total combined render time is higher than 6 minutes, but it's still a lot less than if I had continued rendering the FG pass with low radius and high accuracy!
The "rebuild" options refer to the Final Gathering Map and have changed since the pdf was written. I'm using XSI 4.2 and the options I have are:
- Overwrite
- Append
- Generate
Thanks to Dave wherever you are!.
Now on to fixing some of the stuff I received feedback on.
Thursday, November 23, 2006
clouds, emitters and partitions
Although it is possible to have more than one emitter per particle cloud, it might not be a good idea if you need to separate the emitters into different passes. It is the cloud that matters in the partition, so even if an emitter is not in the partition the emission from it may still appear in the render because the cloud that it belongs to is in the partition.
rig from guide and remove all animation any type do not mix
Here is something to remember if you are using Rigs from Guides. These rigs use Scripted Operators to control the upvector - the scripted operator (as well as any constraints or expressions) will be removed if you use the Remove Animation > from All Parameters, Any
Animation Type command from the Animation panel. Which will result in the rig no longer behaving as expected - i.e. if you use the Remove all animation command and then try to rotate the chest, the upperbody will not follow.
I was not able to recreate the scripted operator and had to regenerate the rig from the guide.
To avoid this, only remove animation from the specific transform (position or rotation) rather than all!
Animation Type command from the Animation panel. Which will result in the rig no longer behaving as expected - i.e. if you use the Remove all animation command and then try to rotate the chest, the upperbody will not follow.
I was not able to recreate the scripted operator and had to regenerate the rig from the guide.
To avoid this, only remove animation from the specific transform (position or rotation) rather than all!
Tuesday, September 19, 2006
my smoking moose film teaser
The film is being rendered ... it's gonna take a while. It took me a long time to get the settings right and the passes right. I almost have a complete version of the film at a small resolution, that I can use to finish the sound edit and the music while the film renders at full resolution.


Friday, August 18, 2006
Painting is easy ...
"Painting is easy when you don't know how, but very difficult when you do."
Edgar Degas
Edgar Degas
Sunday, May 14, 2006
Why re-using a ptype may not give the same color results as the original
Remember that lighting affects the look of your particles, so if you are reusing a ptype with different lighting, it may look completely different. If you are doing this in the same scene and the emission is just not in the same position as the original, you can add an exclusive light to that particle cloud so that it can look the same as the other, but the rest of your scene won't be affected by the additional light.
Sunday, April 23, 2006
animate particle color at frame 1 if you're using age% as the animation reference
This is probably obvious if you think about it, but since I just spent a couple of hours trying to figure out why my particles were rendering grey and not the animated colors I had set, I figure it's worth blogging. If you are using age% animation reference for the particle color, make sure the colors are animated at frame 1. Otherwise depending on what frame you are animating the emission at you may only get the last color of color animation.
Sunday, March 19, 2006
texture editor + extended component selection mode don't mix
Here's a tip when working in the Texture Editor. If you like to work with extended component selection mode turned on, you should turn it off when working in the Texture Editor. When it is on, it keeps adding to the selection so that when you are manipulating sample points you may actually be manipulating many more points than you are aware. So if points on what you believe to be unselected clusters seem to be moving, check to make sure that extended component selection is turned off!
Sunday, March 12, 2006
displacements
... something to remember when applying a displacement - increase the subdivision on the object to see the "real" effect, otherwise what you see in the render region will not be as defined as you expect it to be.
Sunday, March 05, 2006
more smoking
The volume shader didn't work out on the moose's moving cigarette... it looks great on a static object but looks strange on a moving object. I've reverted back to using particles. I've got a decent looking smoke emitting from the cigarette ash, using the beam type for the shape. I've added a vortex (child of the ash) to give the stream a bit of variety. It doesn't look convincing on a static frame but it does look pretty good in movement.
For the exhaling smoke, I've setup events to billow the smoke and have gravity, turbulence and vortex affecting the particles.
For the exhaling smoke, I've setup events to billow the smoke and have gravity, turbulence and vortex affecting the particles.
Monday, February 27, 2006
smokin
Lately, I've been spending most of my smoking moose time working on the smoke effects. Currently focusing on making the moose smoke his cigarette. I've analyzed cigarette smoking videos and films (from getty images and from some DVDs I have .. Ryan has some good examples of cigarette smoke). When smoking a cigarette there are 3 different types of smoke:
I started experimenting with XSI particles and then adding effects in the fx tree. This could work well if I could pin the start of the particles to the end of the cigarette (in theory this is possible using the tracker, but I'm using XSI 4.2 and the fxtree tracker crashes XSI... This is fixed in 5.0 but I'm a bit weary of upgrading at this point in production).
Currently I'm experimenting with the volume shader for cigarette smoke. You can get a good head start on this by using Holger Schonberger's preset downloadable from http://www.edharriss.com/shaders/shaders.htm. A small tip about using the volume shader technique - the smoke rises straight up until it hits the center of the object - so to control when the turbulence starts in the smoke, edit the center of the object.
For the exhaling of the smoke, I'm currently experimenting with the smoke explosion particleop.
- the smoke that rises from the tip (end) of the cigarette as it burns
- the smoke that rises from the filter of the cigarette after an inhalation (most likely this is the smoke that has been pulled through the cigarette but didn't get inhaled)
- the smoke that the smoker blows out
I started experimenting with XSI particles and then adding effects in the fx tree. This could work well if I could pin the start of the particles to the end of the cigarette (in theory this is possible using the tracker, but I'm using XSI 4.2 and the fxtree tracker crashes XSI... This is fixed in 5.0 but I'm a bit weary of upgrading at this point in production).
Currently I'm experimenting with the volume shader for cigarette smoke. You can get a good head start on this by using Holger Schonberger's preset downloadable from http://www.edharriss.com/shaders/shaders.htm. A small tip about using the volume shader technique - the smoke rises straight up until it hits the center of the object - so to control when the turbulence starts in the smoke, edit the center of the object.
For the exhaling of the smoke, I'm currently experimenting with the smoke explosion particleop.
Friday, December 23, 2005

Saturday, November 12, 2005
Animating Characters
With the characters skinned and rigged I've been animating and animating and animating!
I use a mix of animation methods, but before I do anything I act out the motion with a stop watch. Actually, before I do that I run through the motion or sequence in my mind until I can see the character performing it, then I act it out with a stop watch. This can take a long time, because I stop and write down the number of seconds for each part of the movement so I end up acting it out a number of time. Once I have the timings down, I may roughly sketch the poses in my sketchbook, or I might jump right in to the scene. I also rely a lot on reference material from the web or from real life. I spend a lot of time looking at the movies on gettyimages or the bbc motion gallery. Of course if the scene has sound, I will use the audio as reference.
I usually start with simply animating the position and orientation of the whole character, followed by the hips, then the feet, the upperbody, then the arms and head, working with poses and using next/prev keyframe to check the pose changes. When I think the poses are good I'll do a quick hiddenline render to see it in real time. I usually leave the secondary animation until all the primary animation is done and things are looking good.
I set the fcurves to be created linear by default rather than spline. Of course for things that absolutely need spline curves, I'll switch the curves back to spline immediately. The canary's swing, for example, absolutely needs a spline curve. For all other curves I will decide at the tweaking stage how to edit the curves. For some I will manually set keys to control the ease-in and -outs, for others I'll just switch the curves to spline.
The most unusual thing I've discovered recently is that birds walk in a backwards human tip toe. Take a look at any of the bird quicktime movies on gettyimages and play them backwards, you'll see what I mean.
Rather than re-write what has already been written about animation by those more qualified than myself, here are a number of valuable online animation references:
Character Animation articles from Siggraph
Spline Doctors blog
Keith Lango (blog, short films and tutorials)
Shaun Freeman (collection of animation tips from various sources)
Carlos Baena (collection of animation tips from various sources)
3D Ark
The other things that help me are reference books and videos! I've got the Illusion of Life and the Animator's Survival kit within hand's reach. But nothing starts a good day of animation like watching an animated short (I keep Warner Bros, Pixar, Aardman, and Rocky & Bullwinkle DVDs and tapes close by).
I use a mix of animation methods, but before I do anything I act out the motion with a stop watch. Actually, before I do that I run through the motion or sequence in my mind until I can see the character performing it, then I act it out with a stop watch. This can take a long time, because I stop and write down the number of seconds for each part of the movement so I end up acting it out a number of time. Once I have the timings down, I may roughly sketch the poses in my sketchbook, or I might jump right in to the scene. I also rely a lot on reference material from the web or from real life. I spend a lot of time looking at the movies on gettyimages or the bbc motion gallery. Of course if the scene has sound, I will use the audio as reference.
I usually start with simply animating the position and orientation of the whole character, followed by the hips, then the feet, the upperbody, then the arms and head, working with poses and using next/prev keyframe to check the pose changes. When I think the poses are good I'll do a quick hiddenline render to see it in real time. I usually leave the secondary animation until all the primary animation is done and things are looking good.
I set the fcurves to be created linear by default rather than spline. Of course for things that absolutely need spline curves, I'll switch the curves back to spline immediately. The canary's swing, for example, absolutely needs a spline curve. For all other curves I will decide at the tweaking stage how to edit the curves. For some I will manually set keys to control the ease-in and -outs, for others I'll just switch the curves to spline.
The most unusual thing I've discovered recently is that birds walk in a backwards human tip toe. Take a look at any of the bird quicktime movies on gettyimages and play them backwards, you'll see what I mean.
Rather than re-write what has already been written about animation by those more qualified than myself, here are a number of valuable online animation references:
Character Animation articles from Siggraph
Spline Doctors blog
Keith Lango (blog, short films and tutorials)
Shaun Freeman (collection of animation tips from various sources)
Carlos Baena (collection of animation tips from various sources)
3D Ark
The other things that help me are reference books and videos! I've got the Illusion of Life and the Animator's Survival kit within hand's reach. But nothing starts a good day of animation like watching an animated short (I keep Warner Bros, Pixar, Aardman, and Rocky & Bullwinkle DVDs and tapes close by).
Wednesday, October 26, 2005
Enveloping (skinning) tips
> use the default values for the envelope (2 skeleton objects and distance based);
> apply a smooth (leave the default values);
> animate or move deformers to see where the weighting needs to be improved;
> sometimes it will be easier to select the points and reassign locally to the deformers they should be assigned to;
> painting weights works well for large area revisions but is a bit difficult to control the accuracy for smaller areas;
> for the final tweaks you may need to edit individual point weighting, selecting a bone with the weight editor open and scrolling through each point works well (although a bit tedious);
> when you are happy with the enveloping, freeze the envelope modifications and save a preset (from the Envelope_Weight property page, located under the Clusters > EnvelopeWeightCls);
> make sure to occasionally check a render region while you are enveloping, or render a short animation sequence, creases in the skinning may be seen in a mental ray render that you don't see in hidden line or shaded.
If you need to add a bone or other deformer to the rig / or if you need to add points to the geometry:
> save a preset of the envelope weights;
> return to the default skeleton pose;
> mute the envelope;
> add the deformer or the points to the geometry;
> set the envelope (leave "automatically reassign envelope" toggled off);
> turn the envelope back on;
> load the preset;
> reassign the points near the added deformer as necessary or in the case of adding points to the geometry reassign the newly added points to the nearest deformers.
> apply a smooth (leave the default values);
> animate or move deformers to see where the weighting needs to be improved;
> sometimes it will be easier to select the points and reassign locally to the deformers they should be assigned to;
> painting weights works well for large area revisions but is a bit difficult to control the accuracy for smaller areas;
> for the final tweaks you may need to edit individual point weighting, selecting a bone with the weight editor open and scrolling through each point works well (although a bit tedious);
> when you are happy with the enveloping, freeze the envelope modifications and save a preset (from the Envelope_Weight property page, located under the Clusters > EnvelopeWeightCls);
> make sure to occasionally check a render region while you are enveloping, or render a short animation sequence, creases in the skinning may be seen in a mental ray render that you don't see in hidden line or shaded.
If you need to add a bone or other deformer to the rig / or if you need to add points to the geometry:
> save a preset of the envelope weights;
> return to the default skeleton pose;
> mute the envelope;
> add the deformer or the points to the geometry;
> set the envelope (leave "automatically reassign envelope" toggled off);
> turn the envelope back on;
> load the preset;
> reassign the points near the added deformer as necessary or in the case of adding points to the geometry reassign the newly added points to the nearest deformers.
Tuesday, October 25, 2005
Preparing the rig and the character's geometry for skinning/enveloping
- create a shelf of tools or a synoptic view to make it easy to select the rig objects;
- test the skeleton/rig and its hierarchy to make sure it moves the way you need it to;
- make sure all bone joints are slightly bent (to ensure the preferred angles are created correctly);
- make sure the shoulder bones extend slightly past the shoulder (to avoid enveloping problems in the armpits);
- make a group of all the deformers (it will be easier to pick in one shot rather than trying to pick each deformer);
- select the skeleton hierarchy in branch mode and set neutral pose (this will zero out the SRT values and make it easier to manipulate);
- open up the kinematics ppg for each bone and make sure the order of rotation is set correctly;
- add transform setups to the objects so they'll switch automatically to the correct transform tool on selection (remember to switch to additive mode for rotations);
- store a skeleton pose of the rig in its default pose (make a reset pose button on the toolbar/synoptic view)
- make sure that the geometry has enough points where the joints will bend;
- freeze the modeling of the geometry;
- test the skeleton/rig and its hierarchy to make sure it moves the way you need it to;
- make sure all bone joints are slightly bent (to ensure the preferred angles are created correctly);
- make sure the shoulder bones extend slightly past the shoulder (to avoid enveloping problems in the armpits);
- make a group of all the deformers (it will be easier to pick in one shot rather than trying to pick each deformer);
- select the skeleton hierarchy in branch mode and set neutral pose (this will zero out the SRT values and make it easier to manipulate);
- open up the kinematics ppg for each bone and make sure the order of rotation is set correctly;
- add transform setups to the objects so they'll switch automatically to the correct transform tool on selection (remember to switch to additive mode for rotations);
- store a skeleton pose of the rig in its default pose (make a reset pose button on the toolbar/synoptic view)
- make sure that the geometry has enough points where the joints will bend;
- freeze the modeling of the geometry;
Monday, October 24, 2005
Create a Skeleton Rig from the Biped Guide
Using a guide to create a rig speeds up the process of building skeletons.
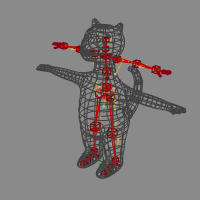
1. Start by loading the model you want to rig.
2. Get the Biped Guide (Animate > Create > Character> Biped Guide).
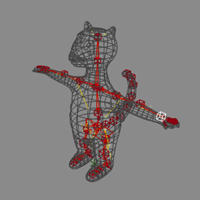
3. Translate the cubes to best fit the skeleton into the model.
4. Duplicate the spine cube (at least 3 or more times) to create a tail. (Or create the tail or other additional bones after you've generated the rig from the guide).
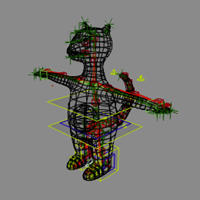 5. Select the guide and generate the rig from the guide (Animate > Create > Character > Rig from Biped Guide. Choose Quaternion for the spine, but skeleton for the neck. I find that non-symmetrical manipulation of arms works better (i.e. both arms have positive scaling).
6. Add bones as necessary. I use 3 bone arms (the extra bone works as the elbow). I also use an upper jaw bone, that makes enveloping the head a bit easy and is a good holder (parent) for the eye and eyebrow nulls.
There are a few things to avoid when transforming the guide:
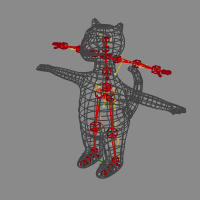
1. Start by loading the model you want to rig.
2. Get the Biped Guide (Animate > Create > Character> Biped Guide).
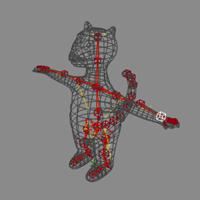
3. Translate the cubes to best fit the skeleton into the model.
4. Duplicate the spine cube (at least 3 or more times) to create a tail. (Or create the tail or other additional bones after you've generated the rig from the guide).
 5. Select the guide and generate the rig from the guide (Animate > Create > Character > Rig from Biped Guide. Choose Quaternion for the spine, but skeleton for the neck. I find that non-symmetrical manipulation of arms works better (i.e. both arms have positive scaling).
6. Add bones as necessary. I use 3 bone arms (the extra bone works as the elbow). I also use an upper jaw bone, that makes enveloping the head a bit easy and is a good holder (parent) for the eye and eyebrow nulls.
There are a few things to avoid when transforming the guide:
- Don't move the ribcage start cube in front of the rib cage end cube;
- Don't delete bones in the guide, wait until after you've created the rig and then delete them in rig;
Monday, October 17, 2005
modeling a character from a sphere
How to make a character from a sphere:

1. Get a polygonal sphere and increase the subdivisions to 12, 12
2. Translate components (points, edges or polygons) to give it an egg like shape
3. Select the top polygons and delete them
4. Freeze the sphere and duplicate it to make the head
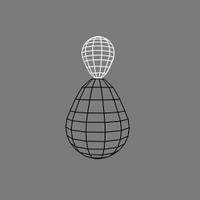
5. Rotate, translate and scale the duplicate above the body
6. Select the bottom row of points and scale them so the neck part of the head matches the neck part of the body.
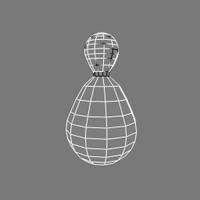
7. Select both the head and the body and choose, Create > polymesh > blend, to merge the head and the body into one object, > toggle off blend, this will merge the points along the neck seam.
8. Select the polymsh and freeze modeling, you might want to rename the object to something more intuitiven than polymsh.
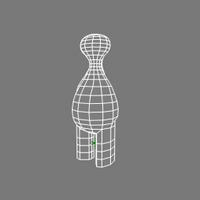 Add the legs, feet, arms, snout, ears
9. Select polygons on the bottom of the body where the body parts will be attached.
10. Extrude along axis, increase the length and the subdivisions to make the body parts.
11. Transform the components as necessary (i.e. translate, scale and rotate, points, edges or polygons to better shape the body parts).
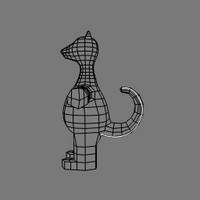 Add the tail
12. Draw a curve in the shape of the tail
13. Select polygons on the body where the tail will extend from
14. Extrude along curve, pick the curve, increase the subdivisions, decrease the scale per subdivision, toggle on AutoRotate
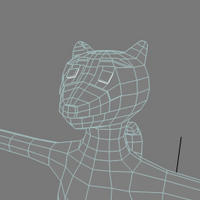 Add the eyes, nose and stripes
15. Select the polygons where the eyes, nose and stripes will appear and extrude them. In these cases the length will be very small.
16. Select the edges along the border of the eyes, nose and stripes and choose Modify > Component > Set Edge Crease Value, increase the value. This makes the nose, eyes or stripe look more like a blob of plasticine added to the model.
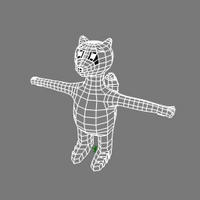 Colour the eyes, nose, stripes and paws
17. Select the polygons that make up the eyes, nose, stripes and paws and create clusters from them.
18. Select the clusters and apply materials to them.
19. Use the + key to increase the subdivisions.
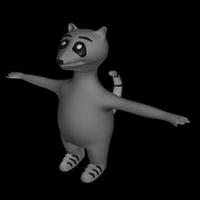
20. Switch to shaded view to double check the result.

1. Get a polygonal sphere and increase the subdivisions to 12, 12
2. Translate components (points, edges or polygons) to give it an egg like shape
3. Select the top polygons and delete them
4. Freeze the sphere and duplicate it to make the head

5. Rotate, translate and scale the duplicate above the body
6. Select the bottom row of points and scale them so the neck part of the head matches the neck part of the body.
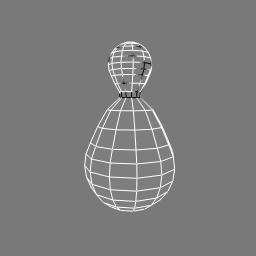
7. Select both the head and the body and choose, Create > polymesh > blend, to merge the head and the body into one object, > toggle off blend, this will merge the points along the neck seam.
8. Select the polymsh and freeze modeling, you might want to rename the object to something more intuitiven than polymsh.
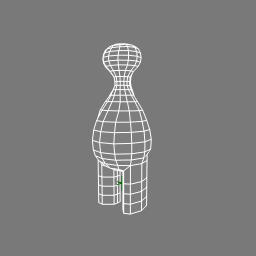 Add the legs, feet, arms, snout, ears
9. Select polygons on the bottom of the body where the body parts will be attached.
10. Extrude along axis, increase the length and the subdivisions to make the body parts.
11. Transform the components as necessary (i.e. translate, scale and rotate, points, edges or polygons to better shape the body parts).
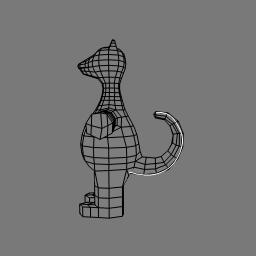 Add the tail
12. Draw a curve in the shape of the tail
13. Select polygons on the body where the tail will extend from
14. Extrude along curve, pick the curve, increase the subdivisions, decrease the scale per subdivision, toggle on AutoRotate
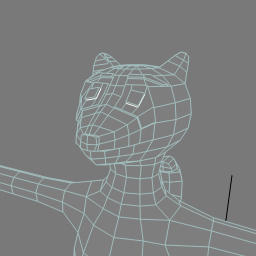 Add the eyes, nose and stripes
15. Select the polygons where the eyes, nose and stripes will appear and extrude them. In these cases the length will be very small.
16. Select the edges along the border of the eyes, nose and stripes and choose Modify > Component > Set Edge Crease Value, increase the value. This makes the nose, eyes or stripe look more like a blob of plasticine added to the model.
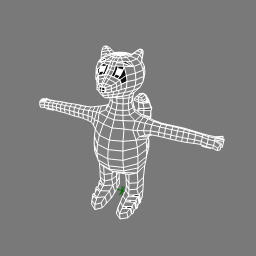 Colour the eyes, nose, stripes and paws
17. Select the polygons that make up the eyes, nose, stripes and paws and create clusters from them.
18. Select the clusters and apply materials to them.
19. Use the + key to increase the subdivisions.

20. Switch to shaded view to double check the result.
Saturday, October 08, 2005
re-applying fcurve action tip
I had stored the tiger's animation for the first sequence into an action. I needed to tweak it a bit (see that the tiger's right foot is going through the floor), so I reapplied it using Actions > Apply > Action. But doing so, overwrote the following animation (sequence 2 and 3).
Today I was happy to discover that Actions > Apply > Paste Action ... allows me to paste the action from sequence 1 back onto the tiger and the animation from sequence 2 and 3 remain in tact (setting the target to the same model as the source).
The only caveat will be to be careful when storing the tweaked animation for sequence 1, not to remove the animation via the store command, since doing so will remove all the animation (not just between the start and end frames of the store action command).
Today I was happy to discover that Actions > Apply > Paste Action ... allows me to paste the action from sequence 1 back onto the tiger and the animation from sequence 2 and 3 remain in tact (setting the target to the same model as the source).
The only caveat will be to be careful when storing the tweaked animation for sequence 1, not to remove the animation via the store command, since doing so will remove all the animation (not just between the start and end frames of the store action command).
Monday, September 26, 2005
another tip on adding deformers to an enveloped character
I've often forgotten to add the deformers to the envelope before trying to reassign points, so I thought it would be good to add this tip to the blog (it was posted on the xsi discussion list recently):
"If you want to add some more influences to an envelope, just select the
geometry, then click the set envelope button again.  The local re-assign
button only works for assigning a point to objects already set as
influences.

-Noodles"
Remember not to toggle on "Automatically Reassign Envelope", if you've adjusted the weighting of the points for the rest of the envelope.
Friday, September 02, 2005
Animating Shapes on top of Envelopes
I'm trying to use shape animation to animate the eyeballs of the characters. Here are a couple of things to keep in mind:
1. Only point clusters can be used when animating shapes (nothing happens if you try to use polygon clusters)
2. Make sure to switch to Secondary Shape Modeling Mode before saving any shapes.
3. Turn on Model > Modify > Component > Relative Mode.
4. Make sure Mixed Weight Mode is turned on in the Shape menu.
5. Make sure Local Relative Mode is turned on in the Shape
6. Rename the Shape Key and the proxy parameter shape weight after EACH savekey.
7. If the shapes shoot off or otherwise go wacky, try turning off Normalize Overlap Weights in the Cluster Shape Combiner Property page and/or setting the Overlap Weight to zero.
The last unsolvable problem that I have is with the shapes going "wacky". The weird thing is that everything works fine, I can animate the shapes and render, but when I save and reload the scene, the shapes are no longer shaped the way they were when created and animated. I've given up on using shape animation for the moose and the tiger.
For the moose I just added two nulls, children of the upper jaw bone, and enveloped points to them. I'm using the nulls to control the pupils transforms. For the tiger, I've just added geometry, again children of the upper jaw, and I'm animating their transform (in reference mode... reference to a flat polygon cluster on the eyeball).
I will need to use Shape animation on the canary when it eats the tiger ... hopefully that will work better.
1. Only point clusters can be used when animating shapes (nothing happens if you try to use polygon clusters)
2. Make sure to switch to Secondary Shape Modeling Mode before saving any shapes.
3. Turn on Model > Modify > Component > Relative Mode.
4. Make sure Mixed Weight Mode is turned on in the Shape menu.
5. Make sure Local Relative Mode is turned on in the Shape
6. Rename the Shape Key and the proxy parameter shape weight after EACH savekey.
7. If the shapes shoot off or otherwise go wacky, try turning off Normalize Overlap Weights in the Cluster Shape Combiner Property page and/or setting the Overlap Weight to zero.
The last unsolvable problem that I have is with the shapes going "wacky". The weird thing is that everything works fine, I can animate the shapes and render, but when I save and reload the scene, the shapes are no longer shaped the way they were when created and animated. I've given up on using shape animation for the moose and the tiger.
For the moose I just added two nulls, children of the upper jaw bone, and enveloped points to them. I'm using the nulls to control the pupils transforms. For the tiger, I've just added geometry, again children of the upper jaw, and I'm animating their transform (in reference mode... reference to a flat polygon cluster on the eyeball).
I will need to use Shape animation on the canary when it eats the tiger ... hopefully that will work better.
Wednesday, August 31, 2005
Adding deformers to transformed envelopes
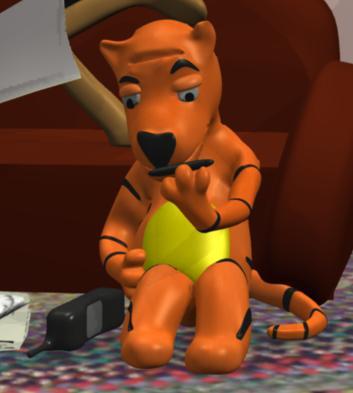
Yikes. I wanted to add 3 nulls to the Tiger's skeleton so I could animate his nostrils when he sniffs his stripe. When I assigned the nostrils' points to the added deformer nulls the points shot off into the distance.
A search on the xsi discussion group on softimage.com confirmed the issue was related to the reference pose and it having been transformed. There are a few different workarounds listed in the postings. Here is a new variation that worked for me.
1.  From the Weight Editor ppg, save the envelope
2.  Select the points you want to assign to the new deformer and assign them to any OTHER deformer
3.  Select the Envelope Operator and Freeze
4.  Select the envelope geometry and set envelope
5.  Load the saved preset.
Thursday, August 04, 2005
object to cluster constraint woes - Skeleton/Envelope Joy
Last night I was struggling with yet another object to cluster constraint. Problems start to happen when I need to change the position / orientation of the object .. i.e. when the moose dies, the cigarette in his mouth (which is constrained to a cluster on his tongue) rolls off the tongue and onto the newspaper. Animating the blend or the activeness of the constraint works (in that it blends or turns it on or off) but I can't get the position and orientation correct, there is always a jump, or I can't place the thing in the place where I want it to be.
This was also happening with with the nose and eyebrows of the tiger (and the moose too). For these, I added polygons to the polygonal object and used crease control. This wouldn't work for the cigarette, it couldn't really be part of the tongue and it needs to roll off it.
I had the same problem with the stripe on the forehead of the tiger, which I solved by adding a 2 bone skeleton chain and enveloping the stripe to the two bones. In this case, this is the perfect solution since the stripe needs to bend when the tiger pulls it off and then needs to be straightened out when he sniffs it.
Yesterday, I also used this chain and envelope technique for the Canary's cigarette, which previously had been constrained to a cluster with which I was struggling with the offsets to get the correct orientation and position of the cigarette when the canary picks it out of the package. This is a great solution here, since I can now animate the length of the second bone of the cigarette as it is smoked.
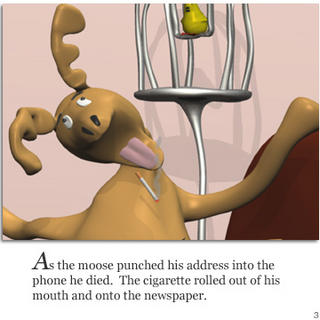
I decided today to use the same Chain and Envelope technique for the Moose's cigarette. It works marvelously. It is so much easier to control the position and orientation of the cigarette just by animating the root of the skeleton. The chain and envelope are children of the tongue and move perfectly with it as the moose chokes to death.
I'm sure there is no problem with the object to cluster constraint in itself. The problems occur when I try to animate offsets / activeness / blend. I'm happy that skeletons and envelopes are working fine for these situations!
This was also happening with with the nose and eyebrows of the tiger (and the moose too). For these, I added polygons to the polygonal object and used crease control. This wouldn't work for the cigarette, it couldn't really be part of the tongue and it needs to roll off it.
I had the same problem with the stripe on the forehead of the tiger, which I solved by adding a 2 bone skeleton chain and enveloping the stripe to the two bones. In this case, this is the perfect solution since the stripe needs to bend when the tiger pulls it off and then needs to be straightened out when he sniffs it.
Yesterday, I also used this chain and envelope technique for the Canary's cigarette, which previously had been constrained to a cluster with which I was struggling with the offsets to get the correct orientation and position of the cigarette when the canary picks it out of the package. This is a great solution here, since I can now animate the length of the second bone of the cigarette as it is smoked.
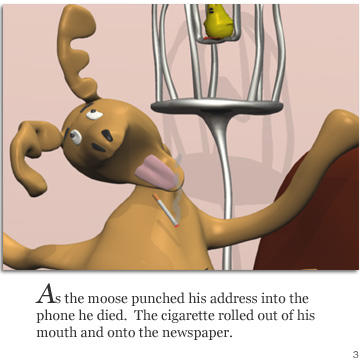
I decided today to use the same Chain and Envelope technique for the Moose's cigarette. It works marvelously. It is so much easier to control the position and orientation of the cigarette just by animating the root of the skeleton. The chain and envelope are children of the tongue and move perfectly with it as the moose chokes to death.
I'm sure there is no problem with the object to cluster constraint in itself. The problems occur when I try to animate offsets / activeness / blend. I'm happy that skeletons and envelopes are working fine for these situations!
Tuesday, August 02, 2005
Quick Renders: Create a new pass and lower the AA rate
I had been using the Camera > Start Capture with the viewport display set to Hidden Line, to render quick previews of the animation I was working on. However I realized that setting up a pass with the render engine set to Hidden Line or OpenGL was just as quick. In addition, Chinny (a colleague at work) showed me that when rendering Hidden Line or OpenGL, the maximum anti-aliasing sample level made absolutely no difference in the quality of the render, setting it to zero, the render was quite fast and the image quite good! Perfect for viewing the animation.
Sunday, July 17, 2005
back at it
I have started to work again on the film. Here are a few things that I've learned recently about XSI while working on the tiger character.
The tiger has body parts that I wanted to look like blobs of plasticine stuck onto his body, such as his belly, nose, eyes, eyebrows and stripes. Originally I had created these as separate parts and constrained them to clusters on the tiger's body. However, when I was animating the tiger, the parts started to flip around and weren't controllable. Instead I added polygons to the polymesh body, then selected the edges around the "bulge", used Model > Modify > Component > Set edge/vertex crease value and set it to 2. This worked quite well.
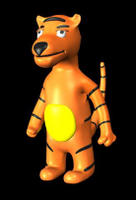 The eyelids are still separate pieces of geometry, but rather than constraining them to a cluster on the polymesh, I've added nulls at the top of the eyes and have made the nulls children of the head bone. I moved the center of the eyelid geometry to the top of the eyelid and am animated the scaling in Y to open and close the eyelids.
First the clusters need to be point clusters and not polygons.
Second, the first Shape you save should be stored rather than saved (Animate > Deform > Shape > Store Shape Key). This is to create a Reference shape that that the others will be compared against. Then save the subsequent shapes (Animate > Deform > Shape > Save Shape Key).
Third, if you're going to use the Custom Property sliders to animate the shapes, you should rename the parameter names at the time you create the ShapeKeys. First rename the Shape Key when you create it and then open the Custom Parameter Set (called Shape Weights and located under the object, pin it open to keep up open while you create other shapes). To rename the parameter, right click on the animation divot and choose "Edit Parameter Definition", change the name.

The tiger has body parts that I wanted to look like blobs of plasticine stuck onto his body, such as his belly, nose, eyes, eyebrows and stripes. Originally I had created these as separate parts and constrained them to clusters on the tiger's body. However, when I was animating the tiger, the parts started to flip around and weren't controllable. Instead I added polygons to the polymesh body, then selected the edges around the "bulge", used Model > Modify > Component > Set edge/vertex crease value and set it to 2. This worked quite well.
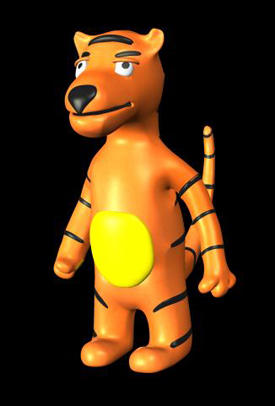 The eyelids are still separate pieces of geometry, but rather than constraining them to a cluster on the polymesh, I've added nulls at the top of the eyes and have made the nulls children of the head bone. I moved the center of the eyelid geometry to the top of the eyelid and am animated the scaling in Y to open and close the eyelids.
First the clusters need to be point clusters and not polygons.
Second, the first Shape you save should be stored rather than saved (Animate > Deform > Shape > Store Shape Key). This is to create a Reference shape that that the others will be compared against. Then save the subsequent shapes (Animate > Deform > Shape > Save Shape Key).
Third, if you're going to use the Custom Property sliders to animate the shapes, you should rename the parameter names at the time you create the ShapeKeys. First rename the Shape Key when you create it and then open the Custom Parameter Set (called Shape Weights and located under the object, pin it open to keep up open while you create other shapes). To rename the parameter, right click on the animation divot and choose "Edit Parameter Definition", change the name.
Wednesday, September 15, 2004
stop in production
as if you haven't noticed .... my postings have stopped since February as I have returned to work full-time. I'm hoping to be able to get back into the animation of this moose film and am upgrading to XSI 4.0 ... I had been using 3.5 ... more to come (soon I hope).
Subscribe to:
Posts (Atom)


