"If you want to add some more influences to an envelope, just select the
geometry, then click the set envelope button again.  The local re-assign
button only works for assigning a point to objects already set as
influences.

-Noodles"
Remember not to toggle on "Automatically Reassign Envelope", if you've adjusted the weighting of the points for the rest of the envelope.
Monday, September 26, 2005
another tip on adding deformers to an enveloped character
I've often forgotten to add the deformers to the envelope before trying to reassign points, so I thought it would be good to add this tip to the blog (it was posted on the xsi discussion list recently):

Friday, September 02, 2005
Animating Shapes on top of Envelopes
I'm trying to use shape animation to animate the eyeballs of the characters. Here are a couple of things to keep in mind:
1. Only point clusters can be used when animating shapes (nothing happens if you try to use polygon clusters)
2. Make sure to switch to Secondary Shape Modeling Mode before saving any shapes.
3. Turn on Model > Modify > Component > Relative Mode.
4. Make sure Mixed Weight Mode is turned on in the Shape menu.
5. Make sure Local Relative Mode is turned on in the Shape
6. Rename the Shape Key and the proxy parameter shape weight after EACH savekey.
7. If the shapes shoot off or otherwise go wacky, try turning off Normalize Overlap Weights in the Cluster Shape Combiner Property page and/or setting the Overlap Weight to zero.
The last unsolvable problem that I have is with the shapes going "wacky". The weird thing is that everything works fine, I can animate the shapes and render, but when I save and reload the scene, the shapes are no longer shaped the way they were when created and animated. I've given up on using shape animation for the moose and the tiger.
For the moose I just added two nulls, children of the upper jaw bone, and enveloped points to them. I'm using the nulls to control the pupils transforms. For the tiger, I've just added geometry, again children of the upper jaw, and I'm animating their transform (in reference mode... reference to a flat polygon cluster on the eyeball).
I will need to use Shape animation on the canary when it eats the tiger ... hopefully that will work better.
1. Only point clusters can be used when animating shapes (nothing happens if you try to use polygon clusters)
2. Make sure to switch to Secondary Shape Modeling Mode before saving any shapes.
3. Turn on Model > Modify > Component > Relative Mode.
4. Make sure Mixed Weight Mode is turned on in the Shape menu.
5. Make sure Local Relative Mode is turned on in the Shape
6. Rename the Shape Key and the proxy parameter shape weight after EACH savekey.
7. If the shapes shoot off or otherwise go wacky, try turning off Normalize Overlap Weights in the Cluster Shape Combiner Property page and/or setting the Overlap Weight to zero.
The last unsolvable problem that I have is with the shapes going "wacky". The weird thing is that everything works fine, I can animate the shapes and render, but when I save and reload the scene, the shapes are no longer shaped the way they were when created and animated. I've given up on using shape animation for the moose and the tiger.
For the moose I just added two nulls, children of the upper jaw bone, and enveloped points to them. I'm using the nulls to control the pupils transforms. For the tiger, I've just added geometry, again children of the upper jaw, and I'm animating their transform (in reference mode... reference to a flat polygon cluster on the eyeball).
I will need to use Shape animation on the canary when it eats the tiger ... hopefully that will work better.
Wednesday, August 31, 2005
Adding deformers to transformed envelopes
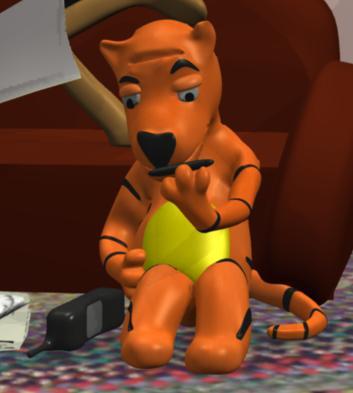
Yikes. I wanted to add 3 nulls to the Tiger's skeleton so I could animate his nostrils when he sniffs his stripe. When I assigned the nostrils' points to the added deformer nulls the points shot off into the distance.
A search on the xsi discussion group on softimage.com confirmed the issue was related to the reference pose and it having been transformed. There are a few different workarounds listed in the postings. Here is a new variation that worked for me.
1.  From the Weight Editor ppg, save the envelope
2.  Select the points you want to assign to the new deformer and assign them to any OTHER deformer
3.  Select the Envelope Operator and Freeze
4.  Select the envelope geometry and set envelope
5.  Load the saved preset.
Thursday, August 04, 2005
object to cluster constraint woes - Skeleton/Envelope Joy
Last night I was struggling with yet another object to cluster constraint. Problems start to happen when I need to change the position / orientation of the object .. i.e. when the moose dies, the cigarette in his mouth (which is constrained to a cluster on his tongue) rolls off the tongue and onto the newspaper. Animating the blend or the activeness of the constraint works (in that it blends or turns it on or off) but I can't get the position and orientation correct, there is always a jump, or I can't place the thing in the place where I want it to be.
This was also happening with with the nose and eyebrows of the tiger (and the moose too). For these, I added polygons to the polygonal object and used crease control. This wouldn't work for the cigarette, it couldn't really be part of the tongue and it needs to roll off it.
I had the same problem with the stripe on the forehead of the tiger, which I solved by adding a 2 bone skeleton chain and enveloping the stripe to the two bones. In this case, this is the perfect solution since the stripe needs to bend when the tiger pulls it off and then needs to be straightened out when he sniffs it.
Yesterday, I also used this chain and envelope technique for the Canary's cigarette, which previously had been constrained to a cluster with which I was struggling with the offsets to get the correct orientation and position of the cigarette when the canary picks it out of the package. This is a great solution here, since I can now animate the length of the second bone of the cigarette as it is smoked.
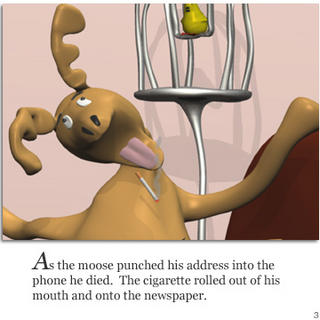
I decided today to use the same Chain and Envelope technique for the Moose's cigarette. It works marvelously. It is so much easier to control the position and orientation of the cigarette just by animating the root of the skeleton. The chain and envelope are children of the tongue and move perfectly with it as the moose chokes to death.
I'm sure there is no problem with the object to cluster constraint in itself. The problems occur when I try to animate offsets / activeness / blend. I'm happy that skeletons and envelopes are working fine for these situations!
This was also happening with with the nose and eyebrows of the tiger (and the moose too). For these, I added polygons to the polygonal object and used crease control. This wouldn't work for the cigarette, it couldn't really be part of the tongue and it needs to roll off it.
I had the same problem with the stripe on the forehead of the tiger, which I solved by adding a 2 bone skeleton chain and enveloping the stripe to the two bones. In this case, this is the perfect solution since the stripe needs to bend when the tiger pulls it off and then needs to be straightened out when he sniffs it.
Yesterday, I also used this chain and envelope technique for the Canary's cigarette, which previously had been constrained to a cluster with which I was struggling with the offsets to get the correct orientation and position of the cigarette when the canary picks it out of the package. This is a great solution here, since I can now animate the length of the second bone of the cigarette as it is smoked.
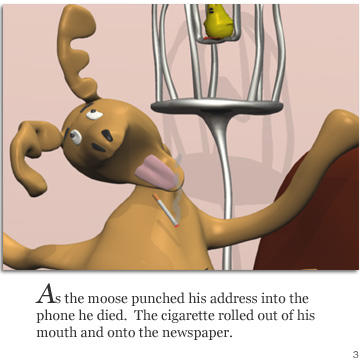
I decided today to use the same Chain and Envelope technique for the Moose's cigarette. It works marvelously. It is so much easier to control the position and orientation of the cigarette just by animating the root of the skeleton. The chain and envelope are children of the tongue and move perfectly with it as the moose chokes to death.
I'm sure there is no problem with the object to cluster constraint in itself. The problems occur when I try to animate offsets / activeness / blend. I'm happy that skeletons and envelopes are working fine for these situations!
Tuesday, August 02, 2005
Quick Renders: Create a new pass and lower the AA rate
I had been using the Camera > Start Capture with the viewport display set to Hidden Line, to render quick previews of the animation I was working on. However I realized that setting up a pass with the render engine set to Hidden Line or OpenGL was just as quick. In addition, Chinny (a colleague at work) showed me that when rendering Hidden Line or OpenGL, the maximum anti-aliasing sample level made absolutely no difference in the quality of the render, setting it to zero, the render was quite fast and the image quite good! Perfect for viewing the animation.
Sunday, July 17, 2005
back at it
I have started to work again on the film. Here are a few things that I've learned recently about XSI while working on the tiger character.
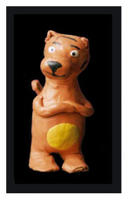
The tiger has body parts that I wanted to look like blobs of plasticine stuck onto his body, such as his belly, nose, eyes, eyebrows and stripes. Originally I had created these as separate parts and constrained them to clusters on the tiger's body. However, when I was animating the tiger, the parts started to flip around and weren't controllable. Instead I added polygons to the polymesh body, then selected the edges around the "bulge", used Model > Modify > Component > Set edge/vertex crease value and set it to 2. This worked quite well.
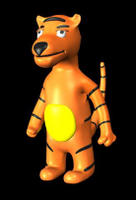 The eyelids are still separate pieces of geometry, but rather than constraining them to a cluster on the polymesh, I've added nulls at the top of the eyes and have made the nulls children of the head bone. I moved the center of the eyelid geometry to the top of the eyelid and am animated the scaling in Y to open and close the eyelids.
First the clusters need to be point clusters and not polygons.
Second, the first Shape you save should be stored rather than saved (Animate > Deform > Shape > Store Shape Key). This is to create a Reference shape that that the others will be compared against. Then save the subsequent shapes (Animate > Deform > Shape > Save Shape Key).
Third, if you're going to use the Custom Property sliders to animate the shapes, you should rename the parameter names at the time you create the ShapeKeys. First rename the Shape Key when you create it and then open the Custom Parameter Set (called Shape Weights and located under the object, pin it open to keep up open while you create other shapes). To rename the parameter, right click on the animation divot and choose "Edit Parameter Definition", change the name.

The tiger has body parts that I wanted to look like blobs of plasticine stuck onto his body, such as his belly, nose, eyes, eyebrows and stripes. Originally I had created these as separate parts and constrained them to clusters on the tiger's body. However, when I was animating the tiger, the parts started to flip around and weren't controllable. Instead I added polygons to the polymesh body, then selected the edges around the "bulge", used Model > Modify > Component > Set edge/vertex crease value and set it to 2. This worked quite well.
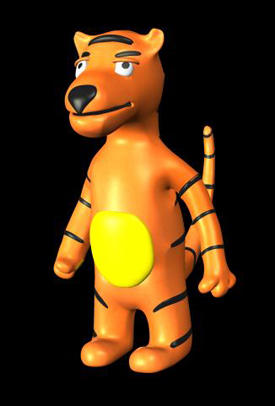 The eyelids are still separate pieces of geometry, but rather than constraining them to a cluster on the polymesh, I've added nulls at the top of the eyes and have made the nulls children of the head bone. I moved the center of the eyelid geometry to the top of the eyelid and am animated the scaling in Y to open and close the eyelids.
First the clusters need to be point clusters and not polygons.
Second, the first Shape you save should be stored rather than saved (Animate > Deform > Shape > Store Shape Key). This is to create a Reference shape that that the others will be compared against. Then save the subsequent shapes (Animate > Deform > Shape > Save Shape Key).
Third, if you're going to use the Custom Property sliders to animate the shapes, you should rename the parameter names at the time you create the ShapeKeys. First rename the Shape Key when you create it and then open the Custom Parameter Set (called Shape Weights and located under the object, pin it open to keep up open while you create other shapes). To rename the parameter, right click on the animation divot and choose "Edit Parameter Definition", change the name.
Wednesday, September 15, 2004
stop in production
as if you haven't noticed .... my postings have stopped since February as I have returned to work full-time. I'm hoping to be able to get back into the animation of this moose film and am upgrading to XSI 4.0 ... I had been using 3.5 ... more to come (soon I hope).
Tuesday, February 03, 2004
I know its been awhile ... I'm still at it... The timing between the canary and tiger is proving difficult ... I think I'm going to have to bite the bullet and upgrade my graphics card ...
Tonight I am trying to store a constraint ... specifically the phone, which is at one point constrained to the moose's hoof, then is animated "freely" then is constrained to the tiger's paw ... its the animation on the constraint offset that isn't getting stripped off when I store the action, so the rotation isn't working .... grrrrr .... think I'll just use a position constraint and rotation fcurves rather than trying to use the pose constraint ...
Tonight I am trying to store a constraint ... specifically the phone, which is at one point constrained to the moose's hoof, then is animated "freely" then is constrained to the tiger's paw ... its the animation on the constraint offset that isn't getting stripped off when I store the action, so the rotation isn't working .... grrrrr .... think I'll just use a position constraint and rotation fcurves rather than trying to use the pose constraint ...
Tuesday, January 06, 2004
mixing animation and constraints
The animation of the tiger brought out a few issues when trying to mix constraints and animation ... for example the tiger's stripe needs to be constrained to his head, until he reaches up and pulls it off, at which point it should be constrained to his paw, until he puts it in his mouth when it needs to be constrained to his tongue. This was causing me many problems (mostly with offsets, scaling and rotation) I wasn't able to get them right. Actually, the stripe is the most complex since it also changes shape when it comes off the head, so there is shape animation to mix in as well.
I made a simpler setup to figure out where I was going wrong. Here are the rules that have come out of the simpler setup (although they don't seem so simple ;o):
> constrained objects (to be mixed between different constraining objects) should be immediately beneath the model (not deeper in the hierarchy, else the parent/child relationship will affect the behaviour)
> for constrained objects that are on skinned objects, you need to use a 2 constraint setup ... first use a null as an anchor to a cluster on the skin (null constrained to cluster) .. make the null the child of the closest bone in the skeleton (this will keep the orientation correct .. if you only use the object to cluster you won't get the rotation constraint).. then constrain the object to the null using a pose constraint (or position and orientation if the scaling freaks out using a pose constraint)
> before creating the constraints, make sure the centers of the objects are correctly placed, otherwise you may end up with objects jumping ... if you do, check the location of the centers of your objects (should only happen when there are offsets)
> scale seems to mess up... use position and orientation constraints rather than pose (or possibly freeze the scaling on the constrained object if its not too late)
> don't forget to set extrapolations for the first constraint (to hold before) and for the last constraint, to hold after ...
I made a simpler setup to figure out where I was going wrong. Here are the rules that have come out of the simpler setup (although they don't seem so simple ;o):
> constrained objects (to be mixed between different constraining objects) should be immediately beneath the model (not deeper in the hierarchy, else the parent/child relationship will affect the behaviour)
> for constrained objects that are on skinned objects, you need to use a 2 constraint setup ... first use a null as an anchor to a cluster on the skin (null constrained to cluster) .. make the null the child of the closest bone in the skeleton (this will keep the orientation correct .. if you only use the object to cluster you won't get the rotation constraint).. then constrain the object to the null using a pose constraint (or position and orientation if the scaling freaks out using a pose constraint)
> before creating the constraints, make sure the centers of the objects are correctly placed, otherwise you may end up with objects jumping ... if you do, check the location of the centers of your objects (should only happen when there are offsets)
> scale seems to mess up... use position and orientation constraints rather than pose (or possibly freeze the scaling on the constrained object if its not too late)
> don't forget to set extrapolations for the first constraint (to hold before) and for the last constraint, to hold after ...
Monday, December 22, 2003
Seasonal distractions are slowing down and I am again able to focus on the tiger. I've been trying to animate him using the mixer and am experiencing difficulty. The reason I want to use the mixer is because the tiger needs to be carefully timed around the canary's actions and if I were to keyframe in the standard way, I'd be moving a lot key frames around so this seems like a good job for the mixer.
I've hit the same problem I had in September when storing and applying poses on the Moose - if a joint is straight when you store the pose, the bone will flip and bend backwards. I'm trying to keep the joints with a slight bend. Today I discovered there is a special command for skeleton poses that's in the skeleton menu. Create > Skeleton > Store/Apply skeleton pose, using this command may avoid the problem previously mentioned. I haven't tried it yet.
Originally I had been selecting the tiger model in branch mode and storing the pose (using the Actions > Store > Transformations command) .. this is not what you want to do ... it takes all the SRT values from every bone and chain and messes up the IK result.... I changed to selecting the effectors and controllers (the upvector objects, the hip cube, shoulder cube and whole tiger cube). This works much better, and is probably what I'll continue using as I am storing animation / fcurves and not only poses (The Store/Apply Skeleton pose thing is for poses only not animation ... I may try a few tests with that now that I know about it. My original tests with poses were disastrous because of the above-mentioned issues!).
I also realized that if you use the Store > Animation command ONLY those objects selected that have animation on them will be stored. If you want Animation and transform values of unanimated objects (i.e. if you want your pose to be stored in addition to the animation) then you need to choose Store > Local Transformations - All Animation or Current Values.
Back to the tiger.
I've hit the same problem I had in September when storing and applying poses on the Moose - if a joint is straight when you store the pose, the bone will flip and bend backwards. I'm trying to keep the joints with a slight bend. Today I discovered there is a special command for skeleton poses that's in the skeleton menu. Create > Skeleton > Store/Apply skeleton pose, using this command may avoid the problem previously mentioned. I haven't tried it yet.
Originally I had been selecting the tiger model in branch mode and storing the pose (using the Actions > Store > Transformations command) .. this is not what you want to do ... it takes all the SRT values from every bone and chain and messes up the IK result.... I changed to selecting the effectors and controllers (the upvector objects, the hip cube, shoulder cube and whole tiger cube). This works much better, and is probably what I'll continue using as I am storing animation / fcurves and not only poses (The Store/Apply Skeleton pose thing is for poses only not animation ... I may try a few tests with that now that I know about it. My original tests with poses were disastrous because of the above-mentioned issues!).
I also realized that if you use the Store > Animation command ONLY those objects selected that have animation on them will be stored. If you want Animation and transform values of unanimated objects (i.e. if you want your pose to be stored in addition to the animation) then you need to choose Store > Local Transformations - All Animation or Current Values.
Back to the tiger.
Monday, December 01, 2003

I've been working on polishing the Tiger. Using painted vertices for the stripes works well, it took a bit of fooling around with the settings in the render tree for the Mix2Colors node .. The stripes still have a strange green glow around them. I suspect that it doesn't have to do with the mix node at all, but instead its the alpha channel that was generated when I painted the vertices that isn't correct ... I'll have to go back and check that. I also have to add the "real" stripe on the tiger's head ...
I had a problem with the orientation of the eyes (and all objects that are constrained to clusters on the body), when rotating the entire tiger ... his first position is on the floor asleep and as soon as I rotated his body, his eyes lost the correct orientation. Fixed that by making them the child of the subdivision surface. Had the same problem with the nose, belly (yellow spot) and eyebrows. All were easy to fix except for the silly eyebrows which just wouldn't pay attention to anything I did ... HA! I fooled them by making them children of the eyeballs, which doesn't make sense to me but it worked !
Tuesday, November 25, 2003
The tiger is IKed and enveloped .... I didn't use the prepackaged rigs, my characters are not human like (the tiger has a tail and has no knees!!) so I decided to move along with my own IK, which is quite an easy rig to create anyway ... the skeleton is not the time consuming thing ... its the enveloping that takes forever!! It took me about 3 tries ... there is never an automatic way of enveloping characters, there are always many points that have to be reweighted one by one ... and it seems more difficult when working with a polygon mesh that has a subdivision surface. Since the polygon mesh is the one that is enveloped, it can be deceiving when weighting the points on it ... when you look at the subdivision surface, the points need to be tweaked more ... I'm tempted to freeze the subdivision surface and just work on that, but then it will be slower to animate (and at this point I'd have to reweight the points again !)
My next step is to add eyes, nose, and stripes to the tiger.
My next step is to add eyes, nose, and stripes to the tiger.
Thursday, November 20, 2003
I've uploaded the rough render of the first scene (remember not all elements are there yet, I've only modelled and animated the moose and the canary so far). watch scene1 rough (1.5 MB MP4)
I have the second scene rendered too, but I'm not happy with the timing, so I'll be tweaking it before uploading it. Its kind of a drag, I should have noticed the problems with the timing before, but I was concentrating on the fire on the sofa (particles) that wasn't rendering ... it was because the color animation type was still set at birth rather than at age%... now I've got the fire but the timing is wrong.
I've modelled the tiger and am quite happy with him so I'm going on to IKing, this time trying the pre-packaged bi-ped rigs, although its going to take some adjusting, since he really doesn't resemble a human.
Due to popular demand, I've changed the mouse pad available in the online store to a moosepad ... I'll be adding a 2004 Calendar of my most popular comics in the store soon... get it for your favorite computer geek.
I have the second scene rendered too, but I'm not happy with the timing, so I'll be tweaking it before uploading it. Its kind of a drag, I should have noticed the problems with the timing before, but I was concentrating on the fire on the sofa (particles) that wasn't rendering ... it was because the color animation type was still set at birth rather than at age%... now I've got the fire but the timing is wrong.
I've modelled the tiger and am quite happy with him so I'm going on to IKing, this time trying the pre-packaged bi-ped rigs, although its going to take some adjusting, since he really doesn't resemble a human.
Due to popular demand, I've changed the mouse pad available in the online store to a moosepad ... I'll be adding a 2004 Calendar of my most popular comics in the store soon... get it for your favorite computer geek.
Sunday, November 16, 2003
The canary has jumped out of his cage, walked over to the cigarettes on the floor and picked one up. Now he's got to light it and I've decided to have him light it off a stray flame from the newspaper. I've been working on smoke and fire in a separate scene and have got it figured out. But now I realize that I just can't import the model of particles, because there are key frames on the smoke and flames and I'll have to move them all ... there there's probably a tool to automatically offset all my keys and but it'll take me a day to figure out how to use it ... so it'll be easier just to recreate the smoke and flames after noting the values ... I hope ...
I've also been trying to make a small QuickTime file of the animation so far (a few friends have asked to see it), but I'm having trouble compressing it down to a decent file size. I'll keep trying. Hopefully you'll see something soon.
I've also been trying to make a small QuickTime file of the animation so far (a few friends have asked to see it), but I'm having trouble compressing it down to a decent file size. I'll keep trying. Hopefully you'll see something soon.
Tuesday, November 11, 2003
I've left the moose aside for the moment and have moved onto the Canary. The Canary was pretty easy to model, but still it took a couple of tries before getting it right. I ended up using a polygonal sphere, moving lots of points, subdividing the area for the wings. At first I tried modelling the beak in the same model as the body but ended up just creating two half cones and closing the slice. The legs were modelled seperately. All parts were polygonal and then converted to subdivision surfaces.
The IK for the bird is quite simple as well since he doesn't move that much. His legs, wings and beaks, required simple skeleton. His bend is controlled by a cube at his "hips".
The hardest part of animating the canary is something I've struggled with for the moose as well. Using constraints and then turning them off, or on. The moose needed them for holding on to the newspaper, to the phone, to the sofa and to the cigarette. The canary needs the constraint for the cigarette. Its probably the nature of the beast, but it seems to take a lot of tweaking of keyframes to get the switch made from the object being constrained to another object to the object being animated with keyframes ... I don't have an answer other than perseverance.
Now, I have to look at particles again, because the newspaper must catch fire. I decided to take a look at the doc and tutorial again hoping that I could get further along than my first attempt. Low and behold, Softimage has provided sample scenes!! Not only for particles, but there is one that shows how to create the image with an alpha channel! Here is the path: XSIinstallation\Data\XSI_SAMPLES\Scenes\*
I'm looking at the Simulation_Particles_SmallFlame scene right now to see if it will help me make my fire!
The IK for the bird is quite simple as well since he doesn't move that much. His legs, wings and beaks, required simple skeleton. His bend is controlled by a cube at his "hips".
The hardest part of animating the canary is something I've struggled with for the moose as well. Using constraints and then turning them off, or on. The moose needed them for holding on to the newspaper, to the phone, to the sofa and to the cigarette. The canary needs the constraint for the cigarette. Its probably the nature of the beast, but it seems to take a lot of tweaking of keyframes to get the switch made from the object being constrained to another object to the object being animated with keyframes ... I don't have an answer other than perseverance.
Now, I have to look at particles again, because the newspaper must catch fire. I decided to take a look at the doc and tutorial again hoping that I could get further along than my first attempt. Low and behold, Softimage has provided sample scenes!! Not only for particles, but there is one that shows how to create the image with an alpha channel! Here is the path: XSIinstallation\Data\XSI_SAMPLES\Scenes\*
I'm looking at the Simulation_Particles_SmallFlame scene right now to see if it will help me make my fire!
Monday, November 03, 2003
The moose is pretty much animated. I'm spending a lot of time tweaking the f-curves and I suspect I need to go and do something else because I am too close to him (and am too critical!). I tied to do exactly that last Thursday, thinking that I would try to use an animated texture to create the smoke from the Moose's cigarette.
Creating an animated texture is quite easy, although at first I used an animated gif painted in Painter only to discover the alpha channel wasn't coming into XSI... so I tried instead with a tif and used Fireworks to animate it so I would have control over the spline ... it was great, until I tried to get XSI to use the alpha channel. It just wouldn't work! I checked the docs, the tutorials both on the CD and from the web and tried and tried and tried ... (sigh).
However my good friend Pierre Tousignant came over this evening to take a look at it with me and he asked if I was using compression on the tif file .. of course Fireworks compresses Tif with LZW compression on. Bringing the file into photoshop and resaving it with LZW turned off, makes XSI happy to give me the alpha channel ... This is kind of annoying, because the file size without compression is much bigger and Photoshop is not easy to animate in ...
Here is what you need to do if you want to use an animated texture with alpha channel in XSI:
1. Animate your image in Fireworks and export to tif 32 format
2. Bring your images into Photoshop and resave, toggling off the LZW compression
3. In XSI, apply a phong material to your object
4. Choose your Texture support for the object
5. Apply the sequence of images as a texture
6. In the phong property page on the transparency/reflection tab click on Connection Icon to the right of the RGBA sliders for the mix color and choose image, reselect the image sequence
7. In the phong property page go to the transparency/reflection tab, toggle on "use alpha" (*you may need to toggle on "invert" depending on your alpha)
I wasn't able to get the alpha channel on the animated gif files to work ... but I didn't spend a lot of time trying to troubleshoot (I tried lossless, alpha transparency).
I can't thank Pierre Tousignant enough for helping me out!
Creating an animated texture is quite easy, although at first I used an animated gif painted in Painter only to discover the alpha channel wasn't coming into XSI... so I tried instead with a tif and used Fireworks to animate it so I would have control over the spline ... it was great, until I tried to get XSI to use the alpha channel. It just wouldn't work! I checked the docs, the tutorials both on the CD and from the web and tried and tried and tried ... (sigh).
However my good friend Pierre Tousignant came over this evening to take a look at it with me and he asked if I was using compression on the tif file .. of course Fireworks compresses Tif with LZW compression on. Bringing the file into photoshop and resaving it with LZW turned off, makes XSI happy to give me the alpha channel ... This is kind of annoying, because the file size without compression is much bigger and Photoshop is not easy to animate in ...
Here is what you need to do if you want to use an animated texture with alpha channel in XSI:
1. Animate your image in Fireworks and export to tif 32 format
2. Bring your images into Photoshop and resave, toggling off the LZW compression
3. In XSI, apply a phong material to your object
4. Choose your Texture support for the object
5. Apply the sequence of images as a texture
6. In the phong property page on the transparency/reflection tab click on Connection Icon to the right of the RGBA sliders for the mix color and choose image, reselect the image sequence
7. In the phong property page go to the transparency/reflection tab, toggle on "use alpha" (*you may need to toggle on "invert" depending on your alpha)
I wasn't able to get the alpha channel on the animated gif files to work ... but I didn't spend a lot of time trying to troubleshoot (I tried lossless, alpha transparency).
I can't thank Pierre Tousignant enough for helping me out!
Monday, October 27, 2003
Still animating the moose .... progress is slow. Haven't decided what to do about graphics card, so for now I'm still animating frame-by-frame with the help of hand written exposure sheets, capturing the frames then dumping them into a premiere file where I can preview with the sound track.
Today's lesson though is about having too many keyframes! The two items that the moose holds and drops and in the case of the phone, he picks up, holds, then drops have proved to be difficult to animate. I'm trying with pose constraints. In the case of the phone, I've animated the blend weight of the constraint to be at zero to begin, then at 1 when the moose picks up the phone and back to zero when he drops it as he dies. (Originally I had animated the active parameter but this did not work .. the timing was wrong... see previous blog). After switching to animating the blend weight, I noticed that the phone was floating/moving on the floor before the moose picked it up. When I investigated in the animation editor, the curves were set to spline so I switched to linear but the phone still moved, even though I confirmed the keyframe values were the same at zero as they were at frame 1200 when the moose picks the phone up and the blend weight of the pose constraint switches to 1. The phone wasn't moving a lot but it was moving ... since I had duplicate key frames at frame 1199, I deleted the keyframes that were at frame 0. This fixed the problem ... a good thing to know!
Today's lesson though is about having too many keyframes! The two items that the moose holds and drops and in the case of the phone, he picks up, holds, then drops have proved to be difficult to animate. I'm trying with pose constraints. In the case of the phone, I've animated the blend weight of the constraint to be at zero to begin, then at 1 when the moose picks up the phone and back to zero when he drops it as he dies. (Originally I had animated the active parameter but this did not work .. the timing was wrong... see previous blog). After switching to animating the blend weight, I noticed that the phone was floating/moving on the floor before the moose picked it up. When I investigated in the animation editor, the curves were set to spline so I switched to linear but the phone still moved, even though I confirmed the keyframe values were the same at zero as they were at frame 1200 when the moose picks the phone up and the blend weight of the pose constraint switches to 1. The phone wasn't moving a lot but it was moving ... since I had duplicate key frames at frame 1199, I deleted the keyframes that were at frame 0. This fixed the problem ... a good thing to know!
Monday, October 20, 2003
It really seems that this Moose just doesn't want to smoke. I haven't posted anything in a bit because I'm finding XSI on my machine quite slow and I've been trying to figure out the best way to see the animation that I'm working on ... my friend wotomoro tells me that my problem is an old graphics card, and it is old ... 4 years now. He says if I had a newer card with more GPUs I'd be able to see me animation almost in real time ... my problem is I don't have the money to buy a new graphics card ... This is a real catch 22 because I think the film would go along much faster if I were able to see my animation in XSI.
He did give me a trick to at least render quicker and in hidden line. There is an option in the viewport/camera menu to capture so, I've set up a camera turning off all the display of the chains, effectors, texture support and other support objects and set the type to hidden line with the hidden line option to use the color of the objects. When doing a capture you can go directly to QuickTime, this will reduce a step for me.
I still have the eyes to animate, as well as the fine tuning on the hands. I'm having a problem with the animation of the newspaper. THe moose is holding the newspaper until he drops it to pick up the phone and dial 911, I had tried to use constraints and then turn them off when he picks up the phone, but this isn't working well. Tomorrow I will turn off the constraints and just keyframe the newspaper.
I will have to tweak the animation of the legs in the animation editor, I didn't get the extreme movement I was hoping for.
If I didn't mention it, I'm leaving particles for later!
Soon I will post a link to the animation of the moose.
He did give me a trick to at least render quicker and in hidden line. There is an option in the viewport/camera menu to capture so, I've set up a camera turning off all the display of the chains, effectors, texture support and other support objects and set the type to hidden line with the hidden line option to use the color of the objects. When doing a capture you can go directly to QuickTime, this will reduce a step for me.
I still have the eyes to animate, as well as the fine tuning on the hands. I'm having a problem with the animation of the newspaper. THe moose is holding the newspaper until he drops it to pick up the phone and dial 911, I had tried to use constraints and then turn them off when he picks up the phone, but this isn't working well. Tomorrow I will turn off the constraints and just keyframe the newspaper.
I will have to tweak the animation of the legs in the animation editor, I didn't get the extreme movement I was hoping for.
If I didn't mention it, I'm leaving particles for later!
Soon I will post a link to the animation of the moose.
Monday, October 13, 2003
Discovered that you can export to a QuickTime Movie from the Flipbook, so this makes it a bit easier to get from XSI into Premiere... I'm still looking for a quick and easy way to render ... for now I've cut the resolution in half (320 x 243) and have reduced the anti-aliasing to 0, turned off shadows. It still takes a bit of time to render out.
I've made good progress today, I've almost finished with the primary animation of the moose. I'd forgotten to model the tongue, so I went back and did that and added the phone while I was at it ... because the moose has to pick up the phone ! Its a cheap-o phone and took less than 10 minutes to model. Of course the moose doesn't have any ears to listen to the phone but I'm skipping that, its not like its a photo-realistic film or anything.
I had to fudge around with the constraints of the eye rigs to the head, 'cause by the time the moose died the eyes were no longer on the surface of the head .. fixed by messing around with the offsets in both tangency and normal pages of the object to cluster constraint property pages.
I've made good progress today, I've almost finished with the primary animation of the moose. I'd forgotten to model the tongue, so I went back and did that and added the phone while I was at it ... because the moose has to pick up the phone ! Its a cheap-o phone and took less than 10 minutes to model. Of course the moose doesn't have any ears to listen to the phone but I'm skipping that, its not like its a photo-realistic film or anything.
I had to fudge around with the constraints of the eye rigs to the head, 'cause by the time the moose died the eyes were no longer on the surface of the head .. fixed by messing around with the offsets in both tangency and normal pages of the object to cluster constraint property pages.
Sunday, October 12, 2003

I'm still trying to figure out "how to animate" a coughing moose in XSI. Here's how I'm trying to work. I have my leica reel in Premiere, which is cut up into shots, so I am trying to animate shots and then drop them into Premiere in place of the storyboard. Should be simple... but the first problem I ran into was with the timing of the cough. I'm hoping its just that my animation is really rusty. I'm rendering the second attempt. Between the two animation attempts, there were a few things that didn't go as nicely as I had hoped.
The first sound clip I loaded in was too complex, it contained all the audio for the first part of the film. Instead I loaded in only the cough sound clip and animated the lower jaw to the cough.
I can't find how to render to hiddenline (or outline). I was hoping to render a line drawing of the animation, so that it would go much quicker between XSI and Premiere. After searching in the docs and on the web, it seems the only way to do something close to this would be to use the Toon Shader... I decided to go back and spend my time trying to get better animation timing, than trying to get the toon rendering working (and risk that it would take just as long if not longer as the shaded rendering).
So I rendered the animation of the lower jaw coughing and brought it into Premiere. Not good (I suppose I shouldn't expect so much on my first try). The timing is off. I thought I would be able to get away without real exposure sheets to break down the action frame-by-frame (in traditional animation they call this Sheet Direction). Its possible that I can do some of the animation without the old paper exposure sheets, but for the cough I had to break it down frame by frame. I'm quite curious to know if the big production houses have Sheet Directors or if the Animator's do their own sheets, if they do them at all!
I attempted using the mixer to animate the cough, but quickly went back to "simple" keyframing. I thought that I might be able to set up pose-to-pose animation but somehow this ended up getting more complicated that I thought it would... so back to keyframing... starting with the upper jaw this time. This seemed to work better.
XSI can be a bit annoying in that sometimes, you're trying to move something and the item won't budge, but if you close XSI, re-open and reload the scene, voila the item will move wherever you want it to (grrrr). Of course its probably my fault and not XSI's!
I'm not using the synoptic view as I thought I would ... mostly for reasons of screen real estate, I don't have two monitors and using that view took up too much space ... Instead I made a custom tool bar with buttons that select the objects that I want to animate.
I don't know if I'm on the right animation path yet. I'm still waiting for the render ... I have to find a faster way to get the images into Premiere to view the test animation.
Subscribe to:
Posts (Atom)


