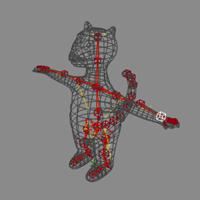
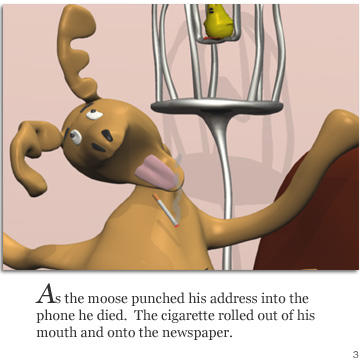
A note about using Character Sub-Key Sets -- in order to create or edit a sub-key set you need to set the current Key Set or Sub Key Set first -- this is the last item of the Character Key menu -- if you don't do this and try creating character sub-key sets (after "selecting" the set that you want to add it under) either nothing will happen or you will get an error message that says Type was nothing -- if you open the script editor log you'll see this (which is a clue that the character set is missing from the command, and that "selecting" it, isn't what you need to do):
' INFO : Must receive Character Set as first parameter
' INFO : Type was Nothing
Here is a screengrab :
Showing posts with label Rigs. Show all posts
Friday, June 22, 2007
Monday, June 18, 2007
Decisions, decisions, decisions
The crazy thing about submitting films to festivals is not only trying to choose a festival that is appropriate for your specific film but also making sure that you can meet the requirements of the festival you submit to. I've recently decided not to submit to the Festival du Nouveau Cinema, partly because I'm not so sure it is a good fit for my film, but mostly because I would need to make a 2nd digiBeta master for the subtitled version (or have professional subtitles done) and I just don't have the cash (or the energy to own more master video tapes). There are 2 other events in Montreal around the same time that I will submit the film to. Of course I will keep the subtitled version that I've done for the DVD.
Tomorrow I'm going to drop of my disk drive at Vision Globale so that they can make me a digiBeta master videotape. That will mean the date of completion is near (might be tomorrow or Wednesday!). I need to decide how many digiBeta copies to make and how many BetaSP copies to make.
By the way, the new web site is live and I really like it ;o) It's kind of crazy -- it is basically one html page -- with the exception of one or two pop ups and a few pdfs that will also pop up (depending on your browser pdf setting).
I've also installed the new version of Softimage XSI (6.01) and am re-rigging the moose. Using the Rig from Biped Guide makes the rigging so much easier and creates such a better rig than I could create drawing skeletons (mostly for the feet but also for the hips and upper body). The tediuous part though is still the enveloping and although it's looking pretty good I think I need to spend a few more hours on it. Next will be to set up character key sets (new in 6.?) and then animate a teaser (the reason to re-rig the moose -- although getting up to speed in xsi 6 won't hurt me a bit!).
Tomorrow I'm going to drop of my disk drive at Vision Globale so that they can make me a digiBeta master videotape. That will mean the date of completion is near (might be tomorrow or Wednesday!). I need to decide how many digiBeta copies to make and how many BetaSP copies to make.
By the way, the new web site is live and I really like it ;o) It's kind of crazy -- it is basically one html page -- with the exception of one or two pop ups and a few pdfs that will also pop up (depending on your browser pdf setting).
I've also installed the new version of Softimage XSI (6.01) and am re-rigging the moose. Using the Rig from Biped Guide makes the rigging so much easier and creates such a better rig than I could create drawing skeletons (mostly for the feet but also for the hips and upper body). The tediuous part though is still the enveloping and although it's looking pretty good I think I need to spend a few more hours on it. Next will be to set up character key sets (new in 6.?) and then animate a teaser (the reason to re-rig the moose -- although getting up to speed in xsi 6 won't hurt me a bit!).
Thursday, November 23, 2006
rig from guide and remove all animation any type do not mix
Here is something to remember if you are using Rigs from Guides. These rigs use Scripted Operators to control the upvector - the scripted operator (as well as any constraints or expressions) will be removed if you use the Remove Animation > from All Parameters, Any
Animation Type command from the Animation panel. Which will result in the rig no longer behaving as expected - i.e. if you use the Remove all animation command and then try to rotate the chest, the upperbody will not follow.
I was not able to recreate the scripted operator and had to regenerate the rig from the guide.
To avoid this, only remove animation from the specific transform (position or rotation) rather than all!
Animation Type command from the Animation panel. Which will result in the rig no longer behaving as expected - i.e. if you use the Remove all animation command and then try to rotate the chest, the upperbody will not follow.
I was not able to recreate the scripted operator and had to regenerate the rig from the guide.
To avoid this, only remove animation from the specific transform (position or rotation) rather than all!
Tuesday, October 25, 2005
Preparing the rig and the character's geometry for skinning/enveloping
- create a shelf of tools or a synoptic view to make it easy to select the rig objects;
- test the skeleton/rig and its hierarchy to make sure it moves the way you need it to;
- make sure all bone joints are slightly bent (to ensure the preferred angles are created correctly);
- make sure the shoulder bones extend slightly past the shoulder (to avoid enveloping problems in the armpits);
- make a group of all the deformers (it will be easier to pick in one shot rather than trying to pick each deformer);
- select the skeleton hierarchy in branch mode and set neutral pose (this will zero out the SRT values and make it easier to manipulate);
- open up the kinematics ppg for each bone and make sure the order of rotation is set correctly;
- add transform setups to the objects so they'll switch automatically to the correct transform tool on selection (remember to switch to additive mode for rotations);
- store a skeleton pose of the rig in its default pose (make a reset pose button on the toolbar/synoptic view)
- make sure that the geometry has enough points where the joints will bend;
- freeze the modeling of the geometry;
- test the skeleton/rig and its hierarchy to make sure it moves the way you need it to;
- make sure all bone joints are slightly bent (to ensure the preferred angles are created correctly);
- make sure the shoulder bones extend slightly past the shoulder (to avoid enveloping problems in the armpits);
- make a group of all the deformers (it will be easier to pick in one shot rather than trying to pick each deformer);
- select the skeleton hierarchy in branch mode and set neutral pose (this will zero out the SRT values and make it easier to manipulate);
- open up the kinematics ppg for each bone and make sure the order of rotation is set correctly;
- add transform setups to the objects so they'll switch automatically to the correct transform tool on selection (remember to switch to additive mode for rotations);
- store a skeleton pose of the rig in its default pose (make a reset pose button on the toolbar/synoptic view)
- make sure that the geometry has enough points where the joints will bend;
- freeze the modeling of the geometry;
Monday, October 24, 2005
Create a Skeleton Rig from the Biped Guide
Using a guide to create a rig speeds up the process of building skeletons.

1. Start by loading the model you want to rig.
2. Get the Biped Guide (Animate > Create > Character> Biped Guide).

3. Translate the cubes to best fit the skeleton into the model.
4. Duplicate the spine cube (at least 3 or more times) to create a tail. (Or create the tail or other additional bones after you've generated the rig from the guide).
5. Select the guide and generate the rig from the guide (Animate > Create > Character > Rig from Biped Guide. Choose Quaternion for the spine, but skeleton for the neck. I find that non-symmetrical manipulation of arms works better (i.e. both arms have positive scaling).
6. Add bones as necessary. I use 3 bone arms (the extra bone works as the elbow). I also use an upper jaw bone, that makes enveloping the head a bit easy and is a good holder (parent) for the eye and eyebrow nulls.
There are a few things to avoid when transforming the guide:

1. Start by loading the model you want to rig.
2. Get the Biped Guide (Animate > Create > Character> Biped Guide).

3. Translate the cubes to best fit the skeleton into the model.
4. Duplicate the spine cube (at least 3 or more times) to create a tail. (Or create the tail or other additional bones after you've generated the rig from the guide).
5. Select the guide and generate the rig from the guide (Animate > Create > Character > Rig from Biped Guide. Choose Quaternion for the spine, but skeleton for the neck. I find that non-symmetrical manipulation of arms works better (i.e. both arms have positive scaling).6. Add bones as necessary. I use 3 bone arms (the extra bone works as the elbow). I also use an upper jaw bone, that makes enveloping the head a bit easy and is a good holder (parent) for the eye and eyebrow nulls.
There are a few things to avoid when transforming the guide:
- Don't move the ribcage start cube in front of the rib cage end cube;
- Don't delete bones in the guide, wait until after you've created the rig and then delete them in rig;
Thursday, August 04, 2005
object to cluster constraint woes - Skeleton/Envelope Joy
Last night I was struggling with yet another object to cluster constraint. Problems start to happen when I need to change the position / orientation of the object .. i.e. when the moose dies, the cigarette in his mouth (which is constrained to a cluster on his tongue) rolls off the tongue and onto the newspaper. Animating the blend or the activeness of the constraint works (in that it blends or turns it on or off) but I can't get the position and orientation correct, there is always a jump, or I can't place the thing in the place where I want it to be.
This was also happening with with the nose and eyebrows of the tiger (and the moose too). For these, I added polygons to the polygonal object and used crease control. This wouldn't work for the cigarette, it couldn't really be part of the tongue and it needs to roll off it.
I had the same problem with the stripe on the forehead of the tiger, which I solved by adding a 2 bone skeleton chain and enveloping the stripe to the two bones. In this case, this is the perfect solution since the stripe needs to bend when the tiger pulls it off and then needs to be straightened out when he sniffs it.
Yesterday, I also used this chain and envelope technique for the Canary's cigarette, which previously had been constrained to a cluster with which I was struggling with the offsets to get the correct orientation and position of the cigarette when the canary picks it out of the package. This is a great solution here, since I can now animate the length of the second bone of the cigarette as it is smoked.
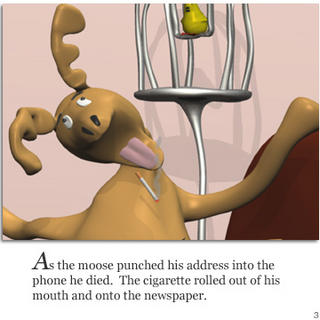
I decided today to use the same Chain and Envelope technique for the Moose's cigarette. It works marvelously. It is so much easier to control the position and orientation of the cigarette just by animating the root of the skeleton. The chain and envelope are children of the tongue and move perfectly with it as the moose chokes to death.
I'm sure there is no problem with the object to cluster constraint in itself. The problems occur when I try to animate offsets / activeness / blend. I'm happy that skeletons and envelopes are working fine for these situations!
This was also happening with with the nose and eyebrows of the tiger (and the moose too). For these, I added polygons to the polygonal object and used crease control. This wouldn't work for the cigarette, it couldn't really be part of the tongue and it needs to roll off it.
I had the same problem with the stripe on the forehead of the tiger, which I solved by adding a 2 bone skeleton chain and enveloping the stripe to the two bones. In this case, this is the perfect solution since the stripe needs to bend when the tiger pulls it off and then needs to be straightened out when he sniffs it.
Yesterday, I also used this chain and envelope technique for the Canary's cigarette, which previously had been constrained to a cluster with which I was struggling with the offsets to get the correct orientation and position of the cigarette when the canary picks it out of the package. This is a great solution here, since I can now animate the length of the second bone of the cigarette as it is smoked.

I decided today to use the same Chain and Envelope technique for the Moose's cigarette. It works marvelously. It is so much easier to control the position and orientation of the cigarette just by animating the root of the skeleton. The chain and envelope are children of the tongue and move perfectly with it as the moose chokes to death.
I'm sure there is no problem with the object to cluster constraint in itself. The problems occur when I try to animate offsets / activeness / blend. I'm happy that skeletons and envelopes are working fine for these situations!
Monday, December 01, 2003

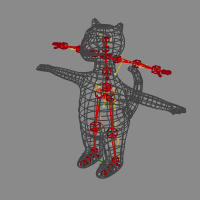
I've been working on polishing the Tiger. Using painted vertices for the stripes works well, it took a bit of fooling around with the settings in the render tree for the Mix2Colors node .. The stripes still have a strange green glow around them. I suspect that it doesn't have to do with the mix node at all, but instead its the alpha channel that was generated when I painted the vertices that isn't correct ... I'll have to go back and check that. I also have to add the "real" stripe on the tiger's head ...
I had a problem with the orientation of the eyes (and all objects that are constrained to clusters on the body), when rotating the entire tiger ... his first position is on the floor asleep and as soon as I rotated his body, his eyes lost the correct orientation. Fixed that by making them the child of the subdivision surface. Had the same problem with the nose, belly (yellow spot) and eyebrows. All were easy to fix except for the silly eyebrows which just wouldn't pay attention to anything I did ... HA! I fooled them by making them children of the eyeballs, which doesn't make sense to me but it worked !
Tuesday, November 25, 2003
The tiger is IKed and enveloped .... I didn't use the prepackaged rigs, my characters are not human like (the tiger has a tail and has no knees!!) so I decided to move along with my own IK, which is quite an easy rig to create anyway ... the skeleton is not the time consuming thing ... its the enveloping that takes forever!! It took me about 3 tries ... there is never an automatic way of enveloping characters, there are always many points that have to be reweighted one by one ... and it seems more difficult when working with a polygon mesh that has a subdivision surface. Since the polygon mesh is the one that is enveloped, it can be deceiving when weighting the points on it ... when you look at the subdivision surface, the points need to be tweaked more ... I'm tempted to freeze the subdivision surface and just work on that, but then it will be slower to animate (and at this point I'd have to reweight the points again !)
My next step is to add eyes, nose, and stripes to the tiger.
Subscribe to:
Posts (Atom)