
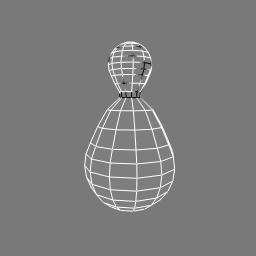
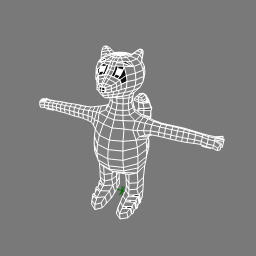
1. Get a polygonal sphere and increase the subdivisions to 12, 12
2. Translate components (points, edges or polygons) to give it an egg like shape
3. Select the top polygons and delete them
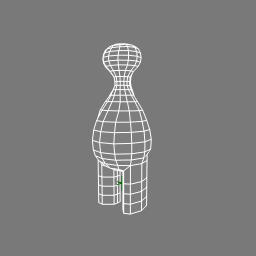
4. Freeze the sphere and duplicate it to make the head

5. Rotate, translate and scale the duplicate above the body
6. Select the bottom row of points and scale them so the neck part of the head matches the neck part of the body.
7. Select both the head and the body and choose, Create > polymesh > blend, to merge the head and the body into one object, > toggle off blend, this will merge the points along the neck seam.
8. Select the polymsh and freeze modeling, you might want to rename the object to something more intuitiven than polymsh.
 Add the legs, feet, arms, snout, ears
9. Select polygons on the bottom of the body where the body parts will be attached.
10. Extrude along axis, increase the length and the subdivisions to make the body parts.
11. Transform the components as necessary (i.e. translate, scale and rotate, points, edges or polygons to better shape the body parts).
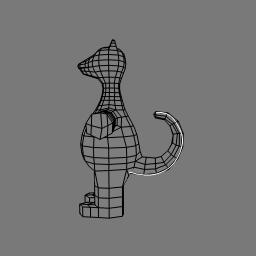 Add the tail
12. Draw a curve in the shape of the tail
13. Select polygons on the body where the tail will extend from
14. Extrude along curve, pick the curve, increase the subdivisions, decrease the scale per subdivision, toggle on AutoRotate
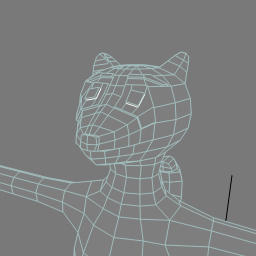 Add the eyes, nose and stripes
15. Select the polygons where the eyes, nose and stripes will appear and extrude them. In these cases the length will be very small.
16. Select the edges along the border of the eyes, nose and stripes and choose Modify > Component > Set Edge Crease Value, increase the value. This makes the nose, eyes or stripe look more like a blob of plasticine added to the model.
 Colour the eyes, nose, stripes and paws
17. Select the polygons that make up the eyes, nose, stripes and paws and create clusters from them.
18. Select the clusters and apply materials to them.
19. Use the + key to increase the subdivisions.

20. Switch to shaded view to double check the result.


No comments:
Post a Comment